Multi container apps
Up to this point, you've been working with single container apps. But, now you will add MySQL to the application stack. The following question often arises - "Where will MySQL run? Install it in the same container or run it separately?" In general, each container should do one thing and do it well. The following are a few reasons to run the container separately:
- There's a good chance you'd have to scale APIs and front-ends differently than databases.
- Separate containers let you version and update versions in isolation.
- While you may use a container for the database locally, you may want to use a managed service for the database in production. You don't want to ship your database engine with your app then.
- Running multiple processes will require a process manager (the container only starts one process), which adds complexity to container startup/shutdown.
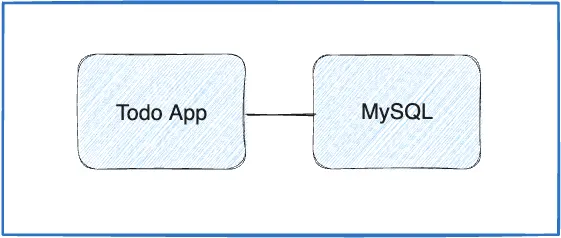
And there are more reasons. So, like the following diagram, it's best to run your app in multiple containers.
Container networking
Remember that containers, by default, run in isolation and don't know anything about other processes or containers on the same machine. So, how do you allow one container to talk to another? The answer is networking. If you place the two containers on the same network, they can talk to each other.
Start MySQL
There are two ways to put a container on a network:
- Assign the network when starting the container.
- Connect an already running container to a network.
In the following steps, you'll create the network first and then attach the MySQL container at startup.
Create the network.
$ docker network create todo-appStart a MySQL container and attach it to the network. You're also going to define a few environment variables that the database will use to initialize the database. To learn more about the MySQL environment variables, see the "Environment Variables" section in the MySQL Docker Hub listing.
$ docker run -d \
    --network todo-app --network-alias mysql \
    -v todo-mysql-data:/var/lib/mysql \
    -e MYSQL_ROOT_PASSWORD=secret \
    -e MYSQL_DATABASE=todos \
    mysql:8.0
$ docker run -d ` --network todo-app --network-alias mysql ` -v todo-mysql-data:/var/lib/mysql ` -e MYSQL_ROOT_PASSWORD=secret ` -e MYSQL_DATABASE=todos ` mysql:8.0$ docker run -d ^ --network todo-app --network-alias mysql ^ -v todo-mysql-data:/var/lib/mysql ^ -e MYSQL_ROOT_PASSWORD=secret ^ -e MYSQL_DATABASE=todos ^ mysql:8.0In the previous command, you can see the
--network-aliasflag. In a later section, you'll learn more about this flag.Tip
You'll notice a volume named
todo-mysql-datain the above command that is mounted at/var/lib/mysql, which is where MySQL stores its data. However, you never ran adocker volume createcommand. Docker recognizes you want to use a named volume and creates one automatically for you.To confirm you have the database up and running, connect to the database and verify that it connects.
$ docker exec -it <mysql-container-id> mysql -u root -pWhen the password prompt comes up, type in
secret. In the MySQL shell, list the databases and verify you see thetodosdatabase.mysql> SHOW DATABASES;You should see output that looks like this:
+--------------------+
| Database           |
+--------------------+
| information_schema |
| mysql              |
| performance_schema |
| sys                |
| todos              |
+--------------------+
5 rows in set (0.00 sec)
Exit the MySQL shell to return to the shell on your machine.
mysql> exitYou now have a
todosdatabase and it's ready for you to use.
Connect to MySQL
Now that you know MySQL is up and running, you can use it. But, how do you use it? If you run another container on the same network, how do you find the container? Remember that each container has its own IP address.
To answer the questions above and better understand container networking, you're going to make use of the nicolaka/netshoot container, which ships with a lot of tools that are useful for troubleshooting or debugging networking issues.
Start a new container using the nicolaka/netshoot image. Make sure to connect it to the same network.
$ docker run -it --network todo-app nicolaka/netshootInside the container, you're going to use the
digcommand, which is a useful DNS tool. You're going to look up the IP address for the hostnamemysql.$ dig mysqlYou should get output like the following.
; <<>> DiG 9.18.8 <<>> mysql
;; global options: +cmd
;; Got answer:
;; ->>HEADER<<- opcode: QUERY, status: NOERROR, id: 32162
;; flags: qr rd ra; QUERY: 1, ANSWER: 1, AUTHORITY: 0, ADDITIONAL: 0

;; QUESTION SECTION:
;mysql.				IN	A

;; ANSWER SECTION:
mysql.			600	IN	A	172.23.0.2

;; Query time: 0 msec
;; SERVER: 127.0.0.11#53(127.0.0.11)
;; WHEN: Tue Oct 01 23:47:24 UTC 2019
;; MSG SIZE  rcvd: 44
In the "ANSWER SECTION", you will see an
Arecord formysqlthat resolves to172.23.0.2(your IP address will most likely have a different value). Whilemysqlisn't normally a valid hostname, Docker was able to resolve it to the IP address of the container that had that network alias. Remember, you used the--network-aliasearlier.What this means is that your app only simply needs to connect to a host named
mysqland it'll talk to the database.
Run your app with MySQL
The todo app supports the setting of a few environment variables to specify MySQL connection settings. They are:
MYSQL_HOST- the hostname for the running MySQL serverMYSQL_USER- the username to use for the connectionMYSQL_PASSWORD- the password to use for the connectionMYSQL_DB- the database to use once connected
Note
While using env vars to set connection settings is generally accepted for development, it's highly discouraged when running applications in production. Diogo Monica, a former lead of security at Docker, wrote a fantastic blog post explaining why.
A more secure mechanism is to use the secret support provided by your container orchestration framework. In most cases, these secrets are mounted as files in the running container. You'll see many apps (including the MySQL image and the todo app) also support env vars with a
_FILEsuffix to point to a file containing the variable.As an example, setting the
MYSQL_PASSWORD_FILEvar will cause the app to use the contents of the referenced file as the connection password. Docker doesn't do anything to support these env vars. Your app will need to know to look for the variable and get the file contents.
You can now start your dev-ready container.
Specify each of the previous environment variables, as well as connect the container to your app network. Make sure that you are in the
getting-started-appdirectory when you run this command.$ docker run -dp 127.0.0.1:3000:3000 \ -w /app -v "$(pwd):/app" \ --network todo-app \ -e MYSQL_HOST=mysql \ -e MYSQL_USER=root \ -e MYSQL_PASSWORD=secret \ -e MYSQL_DB=todos \ node:18-alpine \ sh -c "yarn install && yarn run dev"In Windows, run this command in PowerShell.
$ docker run -dp 127.0.0.1:3000:3000 `
  -w /app -v "$(pwd):/app" `
  --network todo-app `
  -e MYSQL_HOST=mysql `
  -e MYSQL_USER=root `
  -e MYSQL_PASSWORD=secret `
  -e MYSQL_DB=todos `
  node:18-alpine `
  sh -c "yarn install && yarn run dev"
In Windows, run this command in Command Prompt.
$ docker run -dp 127.0.0.1:3000:3000 ^
  -w /app -v "%cd%:/app" ^
  --network todo-app ^
  -e MYSQL_HOST=mysql ^
  -e MYSQL_USER=root ^
  -e MYSQL_PASSWORD=secret ^
  -e MYSQL_DB=todos ^
  node:18-alpine ^
  sh -c "yarn install && yarn run dev"
$ docker run -dp 127.0.0.1:3000:3000 \ -w //app -v "/$(pwd):/app" \ --network todo-app \ -e MYSQL_HOST=mysql \ -e MYSQL_USER=root \ -e MYSQL_PASSWORD=secret \ -e MYSQL_DB=todos \ node:18-alpine \ sh -c "yarn install && yarn run dev"If you look at the logs for the container (
docker logs -f <container-id>), you should see a message similar to the following, which indicates it's using the mysql database.$ nodemon src/index.js [nodemon] 2.0.20 [nodemon] to restart at any time, enter `rs` [nodemon] watching dir(s): *.* [nodemon] starting `node src/index.js` Connected to mysql db at host mysql Listening on port 3000Open the app in your browser and add a few items to your todo list.
Connect to the mysql database and prove that the items are being written to the database. Remember, the password is
secret.$ docker exec -it <mysql-container-id> mysql -p todosAnd in the mysql shell, run the following:
mysql> select * from todo_items;
+--------------------------------------+--------------------+-----------+
| id                                   | name               | completed |
+--------------------------------------+--------------------+-----------+
| c906ff08-60e6-44e6-8f49-ed56a0853e85 | Do amazing things! |         0 |
| 2912a79e-8486-4bc3-a4c5-460793a575ab | Be awesome!        |         0 |
+--------------------------------------+--------------------+-----------+
Your table will look different because it has your items. But, you should see them stored there.
Summary
At this point, you have an application that now stores its data in an external database running in a separate container. You learned a little bit about container networking and service discovery using DNS.
Related information:
Next steps
There's a good chance you are starting to feel a little overwhelmed with everything you need to do to start up this application. You have to create a network, start containers, specify all of the environment variables, expose ports, and more. That's a lot to remember and it's certainly making things harder to pass along to someone else.
In the next section, you'll learn about Docker Compose. With Docker Compose, you can share your application stacks in a much easier way and let others spin them up with a single, simple command.