Multi-stage builds
Explanation
In a traditional build, all build instructions are executed in sequence, and in a single build container: downloading dependencies, compiling code, and packaging the application. All those layers end up in your final image. This approach works, but it leads to bulky images carrying unnecessary weight and increasing your security risks. This is where multi-stage builds come in.
Multi-stage builds introduce multiple stages in your Dockerfile, each with a specific purpose. Think of it like the ability to run different parts of a build in multiple different environments, concurrently. By separating the build environment from the final runtime environment, you can significantly reduce the image size and attack surface. This is especially beneficial for applications with large build dependencies.
Multi-stage builds are recommended for all types of applications.
- For interpreted languages, like JavaScript or Ruby or Python, you can build and minify your code in one stage, and copy the production-ready files to a smaller runtime image. This optimizes your image for deployment.
- For compiled languages, like C or Go or Rust, multi-stage builds let you compile in one stage and copy the compiled binaries into a final runtime image. No need to bundle the entire compiler in your final image.
Here's a simplified example of a multi-stage build structure using pseudo-code. Notice there are multiple FROM statements and a new AS <stage-name>. In addition, the COPY statement in the second stage is copying --from the previous stage.
# Stage 1: Build Environment
FROM builder-image AS build-stage
# Install build tools (e.g., Maven, Gradle)
# Copy source code
# Build commands (e.g., compile, package)

# Stage 2: Runtime environment
FROM runtime-image AS final-stage
#  Copy application artifacts from the build stage (e.g., JAR file)
COPY --from=build-stage /path/in/build/stage /path/to/place/in/final/stage
# Define runtime configuration (e.g., CMD, ENTRYPOINT)
This Dockerfile uses two stages:
- The build stage uses a base image containing build tools needed to compile your application. It includes commands to install build tools, copy source code, and execute build commands.
- The final stage uses a smaller base image suitable for running your application. It copies the compiled artifacts (a JAR file, for example) from the build stage. Finally, it defines the runtime configuration (using
CMDorENTRYPOINT) for starting your application.
Try it now
In this hands-on guide, you'll unlock the power of multi-stage builds to create lean and efficient Docker images for a sample Java application. You'll use a simple “Hello World” Spring Boot-based application built with Maven as your example.
Download and install Docker Desktop.
Open this pre-initialized project to generate a ZIP file. Here’s how that looks:
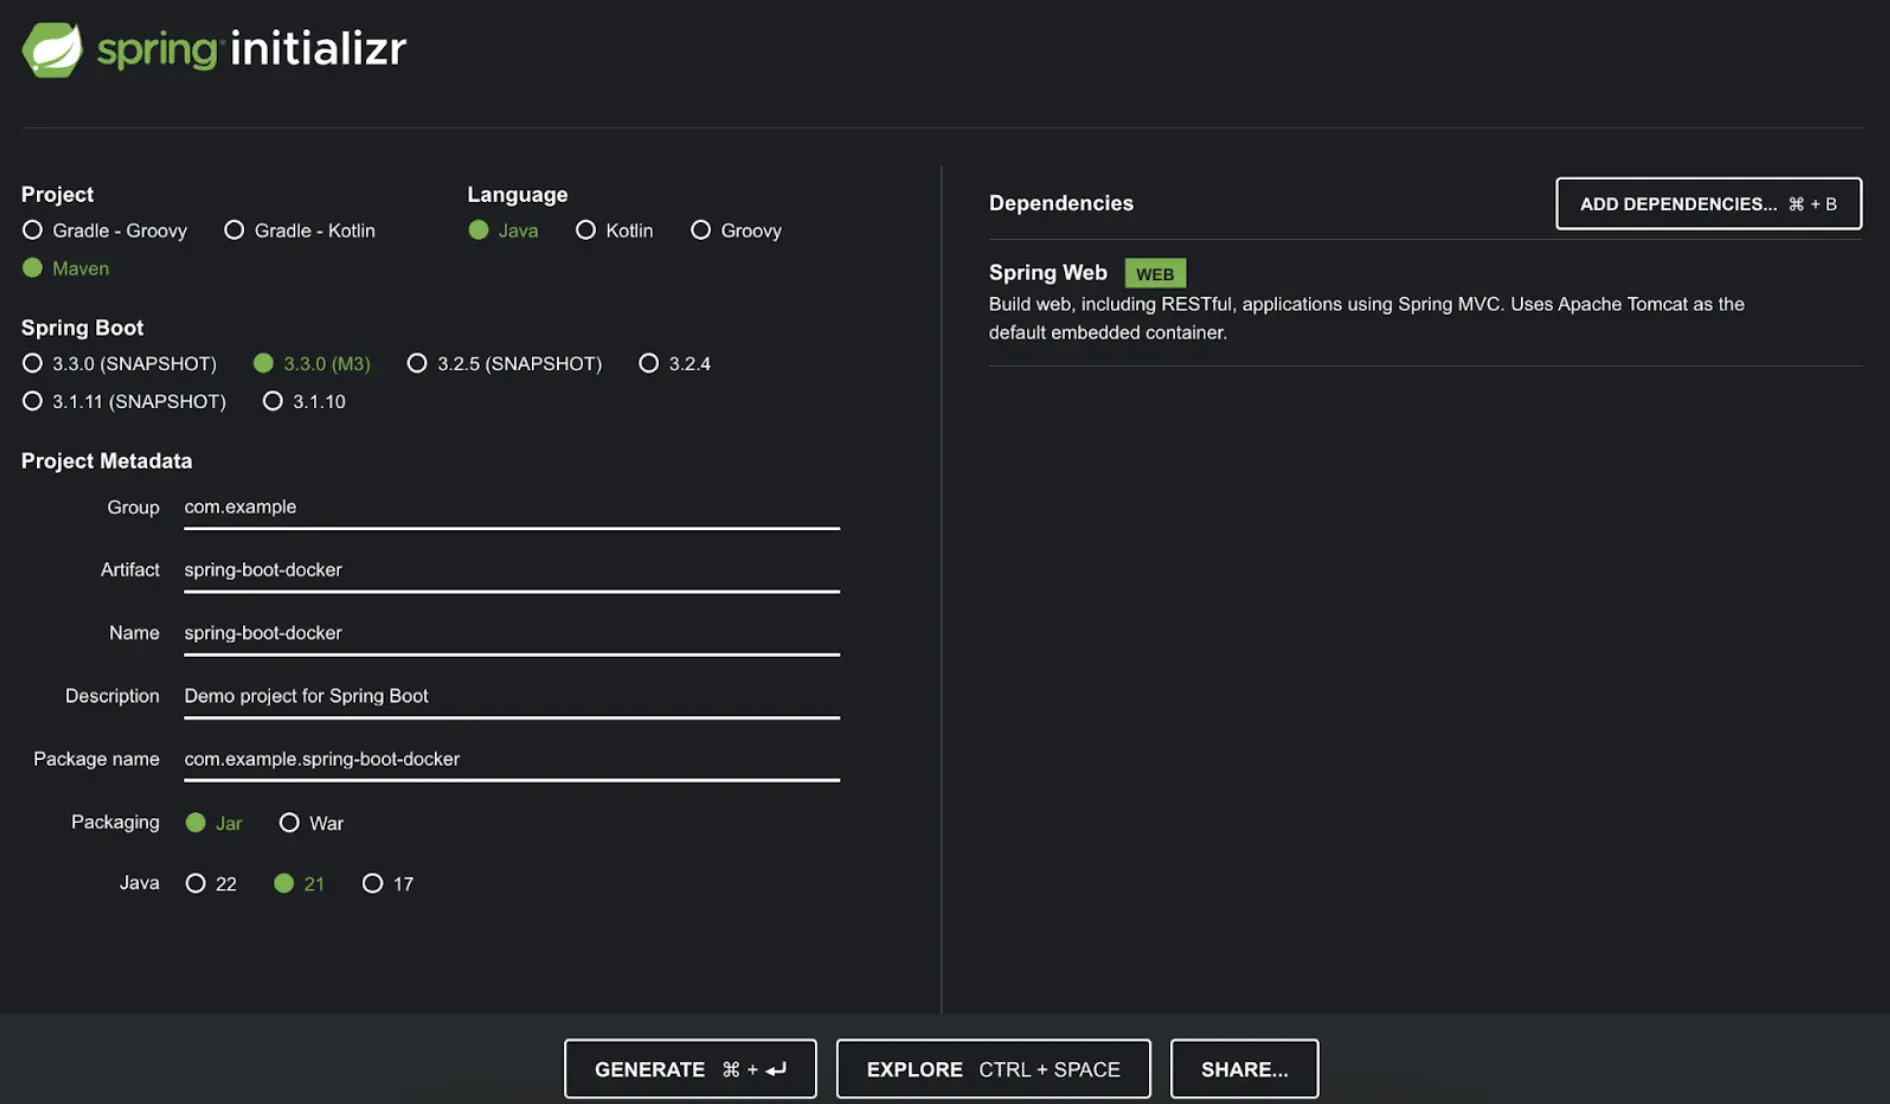
Spring Initializr is a quickstart generator for Spring projects. It provides an extensible API to generate JVM-based projects with implementations for several common concepts — like basic language generation for Java, Kotlin, and Groovy.
Select Generate to create and download the zip file for this project.
For this demonstration, you’ve paired Maven build automation with Java, a Spring Web dependency, and Java 21 for your metadata.
Navigate the project directory. Once you unzip the file, you'll see the following project directory structure:
spring-boot-docker
├── Dockerfile
├── Dockerfile.multi
├── HELP.md
├── mvnw
├── mvnw.cmd
├── pom.xml
└── src
    ├── main
    │   ├── java
    │   │   └── com
    │   │       └── example
    │   │           └── springbootdocker
    │   │               └── SpringBootDockerApplication.java
    │   └── resources
    │       ├── application.properties
    │       ├── static
    │       └── templates
    └── test
        └── java
            └── com
                └── example
                    └── springbootdocker
                        └── SpringBootDockerApplicationTests.java

15 directories, 9 files
The
src/main/javadirectory contains your project's source code, thesrc/test/javadirectory
contains the test source, and thepom.xmlfile is your project’s Project Object Model (POM).The
pom.xmlfile is the core of a Maven project's configuration. It's a single configuration file that
contains most of the information needed to build a customized project. The POM is huge and can seem
daunting. Thankfully, you don't yet need to understand every intricacy to use it effectively.Create a RESTful web service that displays "Hello World!".
Under the
src/main/java/com/example/springbootdocker/directory, you can modify yourSpringBootDockerApplication.javafile with the following content:package com.example.springbootdocker; import org.springframework.boot.SpringApplication; import org.springframework.boot.autoconfigure.SpringBootApplication; import org.springframework.web.bind.annotation.RequestMapping; import org.springframework.web.bind.annotation.RestController; @RestController @SpringBootApplication public class SpringBootDockerApplication { @RequestMapping("/") public String home() { return "Hello World"; } public static void main(String[] args) { SpringApplication.run(SpringBootDockerApplication.class, args); } }The
SpringbootDockerApplication.javafile starts by declaring yourcom.example.springbootdockerpackage and importing necessary Spring frameworks. This Java file creates a simple Spring Boot web application that responds with "Hello World" when a user visits its homepage.
Create the Dockerfile
Now that you have the project, you’re ready to create the Dockerfile.
Create a file named
Dockerfilein the same folder that contains all the other folders and files (like src, pom.xml, etc.).In the
Dockerfile, define your base image by adding the following line:FROM eclipse-temurin:21.0.2_13-jdk-jammyNow, define the working directory by using the
WORKDIRinstruction. This will specify where future commands will run and the directory files will be copied inside the container image.WORKDIR /appCopy both the Maven wrapper script and your project's
pom.xmlfile into the current working directory/appwithin the Docker container.COPY .mvn/ .mvn COPY mvnw pom.xml ./Execute a command within the container. It runs the
./mvnw dependency:go-offlinecommand, which uses the Maven wrapper (./mvnw) to download all dependencies for your project without building the final JAR file (useful for faster builds).RUN ./mvnw dependency:go-offlineCopy the
srcdirectory from your project on the host machine to the/appdirectory within the container.COPY src ./srcSet the default command to be executed when the container starts. This command instructs the container to run the Maven wrapper (
./mvnw) with thespring-boot:rungoal, which will build and execute your Spring Boot application.CMD ["./mvnw", "spring-boot:run"]And with that, you should have the following Dockerfile:
FROM eclipse-temurin:21.0.2_13-jdk-jammy
WORKDIR /app
COPY .mvn/ .mvn
COPY mvnw pom.xml ./
RUN ./mvnw dependency:go-offline
COPY src ./src
CMD ["./mvnw", "spring-boot:run"]
Build the container image
Execute the following command to build the Docker image:
$ docker build -t spring-helloworld .Check the size of the Docker image by using the
docker imagescommand:$ docker imagesDoing so will produce output like the following:
REPOSITORY          TAG       IMAGE ID       CREATED          SIZE
spring-helloworld   latest    ff708d5ee194   3 minutes ago    880MB
This output shows that your image is 880MB in size. It contains the full JDK, Maven toolchain, and more. In production, you don’t need that in your final image.
Run the Spring Boot application
Now that you have an image built, it's time to run the container.
$ docker run -d -p 8080:8080 spring-helloworldYou'll then see output similar to the following in the container log:
[INFO] --- spring-boot:3.3.0-M3:run (default-cli) @ spring-boot-docker ---
[INFO] Attaching agents: []
 .   ____          _            __ _ _
 /\\ / ___'_ __ _ _(_)_ __  __ _ \ \ \ \
 ( ( )\___ | '_ | '_| | '_ \/ _` | \ \ \ \
 \\/  ___)| |_)| | | | | || (_| |  ) ) ) )
 '  |____| .__|_| |_|_| |_\__, | / / / /
  =========|_|==============|___/=/_/_/_/

 :: Spring Boot ::             (v3.3.0-M3)

 2024-04-04T15:36:47.202Z  INFO 42 --- [spring-boot-docker] [           main]
 c.e.s.SpringBootDockerApplication        : Starting SpringBootDockerApplication using Java
 21.0.2 with PID 42 (/app/target/classes started by root in /app)
 ….
Access your “Hello World” page through your web browser at http://localhost:8080, or via this curl command:
$ curl localhost:8080
Hello World
Use multi-stage builds
Consider the following Dockerfile:
FROM eclipse-temurin:21.0.2_13-jdk-jammy as builder
WORKDIR /opt/app
COPY .mvn/ .mvn
COPY mvnw pom.xml ./
RUN ./mvnw dependency:go-offline
COPY ./src ./src
RUN ./mvnw clean install
FROM eclipse-temurin:21.0.2_13-jre-jammy as final
WORKDIR /opt/app
EXPOSE 8080
COPY --from=builder /opt/app/target/*.jar /opt/app/*.jar
ENTRYPOINT ["java", "-jar", "/opt/app/*.jar"]
Notice that this Dockerfile has been split into two stages.
The first stage remains the same as the previous Dockerfile, providing a Java Development Kit (JDK) environment for building the application. This stage is given the name of builder.
The second stage is a new stage named
final. Since it startsFROM builder, it inherits everything from the base stage (JDK environment). It uses a slimmereclipse-temurin:21.0.2_13-jre-jammyimage, containing just the Java Runtime Environment (JRE) needed to run the application. This image provides a Java Runtime Environment (JRE) which is enough for running the compiled application (JAR file).
For production use, it's highly recommended that you produce a custom JRE-like runtime using jlink. JRE images are available for all versions of Eclipse Temurin, but
jlinkallows you to create a minimal runtime containing only the necessary Java modules for your application. This can significantly reduce the size and improve the security of your final image. Refer to this page for more information.
With multi-stage builds, a Docker build uses one base image for compilation, packaging, and unit tests and then a separate image for the application runtime. As a result, the final image is smaller in size since it doesn’t contain any development or debugging tools. By separating the build environment from the final runtime environment, you can significantly reduce the image size and increase the security of your final images.
Now, rebuild your image and run your ready-to-use production build.
$ docker build -t spring-helloworld-builder .This command builds a Docker image named
spring-helloworld-builderusing the final stage from yourDockerfilefile located in the current directory.Note
In your multi-stage Dockerfile, the final stage (final) is the default target for building. This means that if you don't explicitly specify a target stage using the
--targetflag in thedocker buildcommand, Docker will automatically build the last stage by default. You could usedocker build -t spring-helloworld-builder --target builder .to build only the builder stage with the JDK environment.Look at the image size difference by using the
docker imagescommand:$ docker imagesYou'll get output similar to the following:
spring-helloworld-builder latest    c5c76cb815c0   24 minutes ago      428MB
spring-helloworld         latest    ff708d5ee194   About an hour ago   880MB
Your final image is just 428 MB, compared to the original build size of 880 MB.
By optimizing each stage and only including what's necessary, you were able to significantly reduce the
overall image size while still achieving the same functionality. This not only improves performance but
also makes your Docker images more lightweight, more secure, and easier to manage.