Create an advanced frontend extension
To start creating your extension, you first need a directory with files which range from the extension’s source code to the required extension-specific files. This page provides information on how to set up an extension with a more advanced frontend.
Before you start, make sure you have installed the latest version of Docker Desktop.
Extension folder structure
The quickest way to create a new extension is to run docker extension init my-extension as in the
Quickstart. This creates a new directory my-extension that contains a fully functional extension.
TipThe
docker extension initgenerates a React based extension. But you can still use it as a starting point for your own extension and use any other frontend framework, like Vue, Angular, Svelte, etc. or even stay with vanilla Javascript.
Although you can start from an empty directory or from the react-extension sample folder,
it's highly recommended that you start from the docker extension init command and change it to suit your needs.
.
├── Dockerfile # (1)
├── ui # (2)
│   ├── public # (3)
│   │   └── index.html
│   ├── src # (4)
│   │   ├── App.tsx
│   │   ├── index.tsx
│   ├── package.json
│   └── package-lock.lock
│   ├── tsconfig.json
├── docker.svg # (5)
└── metadata.json # (6)- Contains everything required to build the extension and run it in Docker Desktop.
- High-level folder containing your front-end app source code.
- Assets that aren’t compiled or dynamically generated are stored here. These can be static assets like logos or the robots.txt file.
- The src, or source folder contains all the React components, external CSS files, and dynamic assets that are brought into the component files.
- The icon that is displayed in the left-menu of the Docker Desktop Dashboard.
- A file that provides information about the extension such as the name, description, and version.
Adapting the Dockerfile
NoteWhen using the
docker extension init, it creates aDockerfilethat already contains what is needed for a React extension.
Once the extension is created, you need to configure the Dockerfile to build the extension and configure the labels
that are used to populate the extension's card in the Marketplace. Here is an example of a Dockerfile for a React
extension:
# syntax=docker/dockerfile:1
FROM --platform=$BUILDPLATFORM node:18.9-alpine3.15 AS client-builder
WORKDIR /ui
# cache packages in layer
COPY ui/package.json /ui/package.json
COPY ui/package-lock.json /ui/package-lock.json
RUN --mount=type=cache,target=/usr/src/app/.npm \
    npm set cache /usr/src/app/.npm && \
    npm ci
# install
COPY ui /ui
RUN npm run build

FROM alpine
LABEL org.opencontainers.image.title="My extension" \
    org.opencontainers.image.description="Your Desktop Extension Description" \
    org.opencontainers.image.vendor="Awesome Inc." \
    com.docker.desktop.extension.api.version="0.3.3" \
    com.docker.desktop.extension.icon="https://www.docker.com/wp-content/uploads/2022/03/Moby-logo.png" \
    com.docker.extension.screenshots="" \
    com.docker.extension.detailed-description="" \
    com.docker.extension.publisher-url="" \
    com.docker.extension.additional-urls="" \
    com.docker.extension.changelog=""

COPY metadata.json .
COPY docker.svg .
COPY --from=client-builder /ui/build ui
Note
In the example Dockerfile, you can see that the image label
com.docker.desktop.extension.iconis set to an icon URL. The Extensions Marketplace displays this icon without installing the extension. The Dockerfile also includesCOPY docker.svg .to copy an icon file inside the image. This second icon file is used to display the extension UI in the Dashboard, once the extension is installed.
ImportantWe don't have a working Dockerfile for Vue yet. Fill out the form and let us know if you'd like a Dockerfile for Vue.
ImportantWe don't have a working Dockerfile for Angular yet. Fill out the form and let us know if you'd like a Dockerfile for Angular.
ImportantWe don't have a working Dockerfile for Svelte yet. Fill out the form and let us know if you'd like a Dockerfile for Svelte.
Configure the metadata file
In order to add a tab in Docker Desktop for your extension, you have to configure it in the metadata.json
file the root of your extension directory.
{
  "icon": "docker.svg",
  "ui": {
    "dashboard-tab": {
      "title": "UI Extension",
      "root": "/ui",
      "src": "index.html"
    }
  }
}
The title property is the name of the extension that is displayed in the left-menu of the Docker Desktop Dashboard.
The root property is the path to the frontend application in the extension's container filesystem used by the
system to deploy it on the host.
The src property is the path to the HTML entry point of the frontend application within the root folder.
For more information on the ui section of the metadata.json, see Metadata.
Build the extension and install it
Now that you have configured the extension, you need to build the extension image that Docker Desktop will use to install it.
docker build --tag=awesome-inc/my-extension:latest .This built an image tagged awesome-inc/my-extension:latest, you can run docker inspect awesome-inc/my-extension:latest to see more details about it.
Finally, you can install the extension and see it appearing in the Docker Desktop Dashboard.
docker extension install awesome-inc/my-extension:latestUse the Extension APIs client
To use the Extension APIs and perform actions with Docker Desktop, the extension must first import the
@docker/extension-api-client library. To install it, run the command below:
npm install @docker/extension-api-clientThen call the createDockerDesktopClient function to create a client object to call the extension APIs.
import { createDockerDesktopClient } from '@docker/extension-api-client';

const ddClient = createDockerDesktopClient();
When using Typescript, you can also install @docker/extension-api-client-types as a dev dependency. This will
provide you with type definitions for the extension APIs and auto-completion in your IDE.
npm install @docker/extension-api-client-types --save-dev
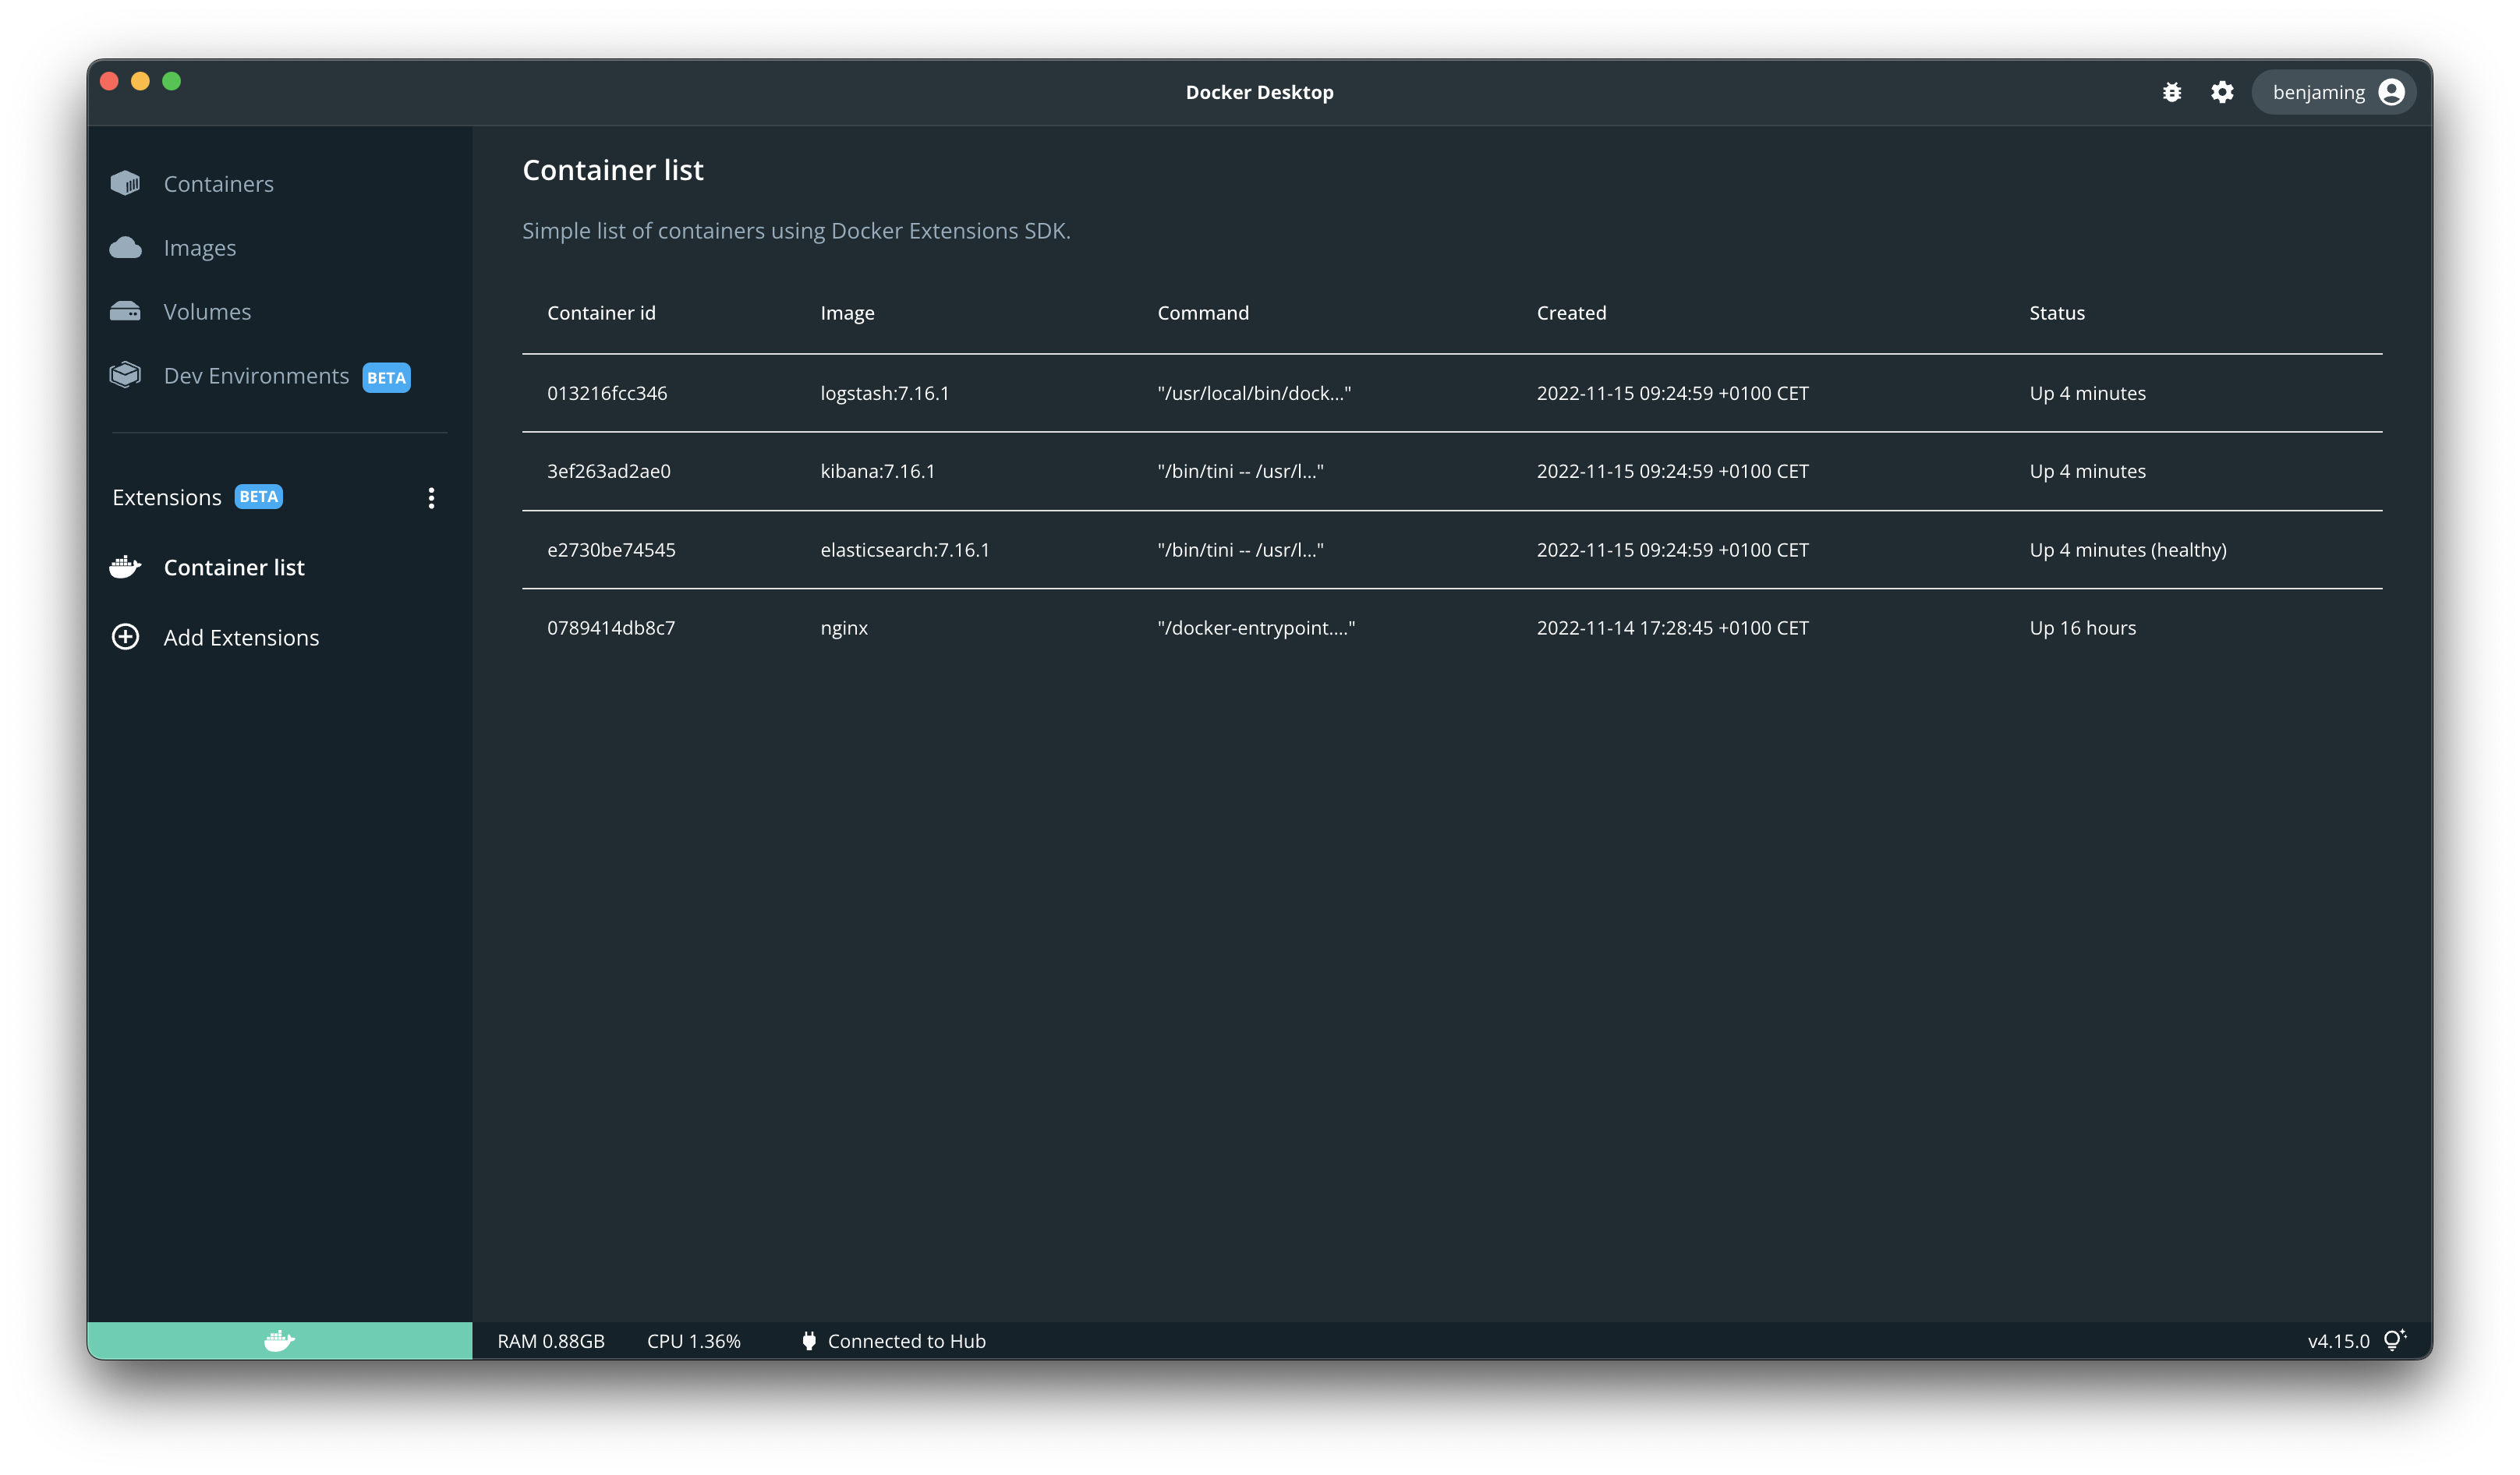
For example, you can use the docker.cli.exec function to get the list of all the containers via the docker ps --all
command and display the result in a table.
Replace the ui/src/App.tsx file with the following code:
// ui/src/App.tsx
import React, { useEffect } from 'react';
import {
  Paper,
  Stack,
  Table,
  TableBody,
  TableCell,
  TableContainer,
  TableHead,
  TableRow,
  Typography
} from "@mui/material";
import { createDockerDesktopClient } from "@docker/extension-api-client";

//obtain docker desktop extension client
const ddClient = createDockerDesktopClient();

export function App() {
  const [containers, setContainers] = React.useState<any[]>([]);

  useEffect(() => {
    // List all containers
    ddClient.docker.cli.exec('ps', ['--all', '--format', '"{{json .}}"']).then((result) => {
      // result.parseJsonLines() parses the output of the command into an array of objects
      setContainers(result.parseJsonLines());
    });
  }, []);

  return (
    <Stack>
      <Typography data-testid="heading" variant="h3" role="title">
        Container list
      </Typography>
      <Typography
      data-testid="subheading"
      variant="body1"
      color="text.secondary"
      sx={{ mt: 2 }}
    >
      Simple list of containers using Docker Extensions SDK.
      </Typography>
      <TableContainer sx={{mt:2}}>
        <Table>
          <TableHead>
            <TableRow>
              <TableCell>Container id</TableCell>
              <TableCell>Image</TableCell>
              <TableCell>Command</TableCell>
              <TableCell>Created</TableCell>
              <TableCell>Status</TableCell>
            </TableRow>
          </TableHead>
          <TableBody>
            {containers.map((container) => (
              <TableRow
                key={container.ID}
                sx={{ '&:last-child td, &:last-child th': { border: 0 } }}
              >
                <TableCell>{container.ID}</TableCell>
                <TableCell>{container.Image}</TableCell>
                <TableCell>{container.Command}</TableCell>
                <TableCell>{container.CreatedAt}</TableCell>
                <TableCell>{container.Status}</TableCell>
              </TableRow>
            ))}
          </TableBody>
        </Table>
      </TableContainer>
    </Stack>
  );
}
ImportantWe don't have an example for Vue yet. Fill out the form and let us know if you'd like a sample with Vue.
ImportantWe don't have an example for Angular yet. Fill out the form and let us know if you'd like a sample with Angular.
ImportantWe don't have an example for Svelte yet. Fill out the form and let us know if you'd like a sample with Svelte.
Policies enforced for the front-end code
Extension UI code is rendered in a separate electron session and doesn't have a node.js environment initialized, nor direct access to the electron APIs.
This is to limit the possible unexpected side effects to the overall Docker Dashboard.
The extension UI code can't perform privileged tasks, such as making changes to the system, or spawning sub-processes, except by using the SDK APIs provided with the extension framework. The Extension UI code can also perform interactions with Docker Desktop, such as navigating to various places in the Dashboard, only through the extension SDK APIs.
Extensions UI parts are isolated from each other and extension UI code is running in its own session for each extension. Extensions can't access other extensions’ session data.
localStorage is one of the mechanisms of a browser’s web storage. It allows users to save data as key-value pairs in the browser for later use. localStorage doesn't clear data when the browser (the extension pane) closes. This makes it ideal for persisting data when navigating out of the extension to other parts of Docker Desktop.
If your extension uses localStorage to store data, other extensions running in Docker Desktop can't access the local storage of your extension. The extension’s local storage is persisted even after Docker Desktop is stopped or restarted. When an extension is upgraded, its local storage is persisted, whereas when it is uninstalled, its local storage is completely removed.
Re-build the extension and update it
Since you have modified the code of the extension, you must build again the extension.
$ docker build --tag=awesome-inc/my-extension:latest .
Once built, you need to update it.
$ docker extension update awesome-inc/my-extension:latest
Now you can see the backend service running in the containers tab of the Docker Desktop Dashboard and watch the logs when you need to debug it.
TipYou can turn on hot reloading to avoid the need to rebuild the extension every time you make a change.
What's next?
- Add a backend to your extension.
- Learn how to test and debug your extension.
- Learn how to setup CI for your extension.
- Learn more about extensions architecture.
- For more information and guidelines on building the UI, see the Design and UI styling section.
- If you want to set up user authentication for the extension, see Authentication.