Building best practices
Use multi-stage builds
Multi-stage builds let you reduce the size of your final image, by creating a cleaner separation between the building of your image and the final output. Split your Dockerfile instructions into distinct stages to make sure that the resulting output only contains the files that are needed to run the application.
Using multiple stages can also let you build more efficiently by executing build steps in parallel.
See Multi-stage builds for more information.
Create reusable stages
If you have multiple images with a lot in common, consider creating a reusable stage that includes the shared components, and basing your unique stages on that. Docker only needs to build the common stage once. This means that your derivative images use memory on the Docker host more efficiently and load more quickly.
It's also easier to maintain a common base stage ("Don't repeat yourself"), than it is to have multiple different stages doing similar things.
Choose the right base image
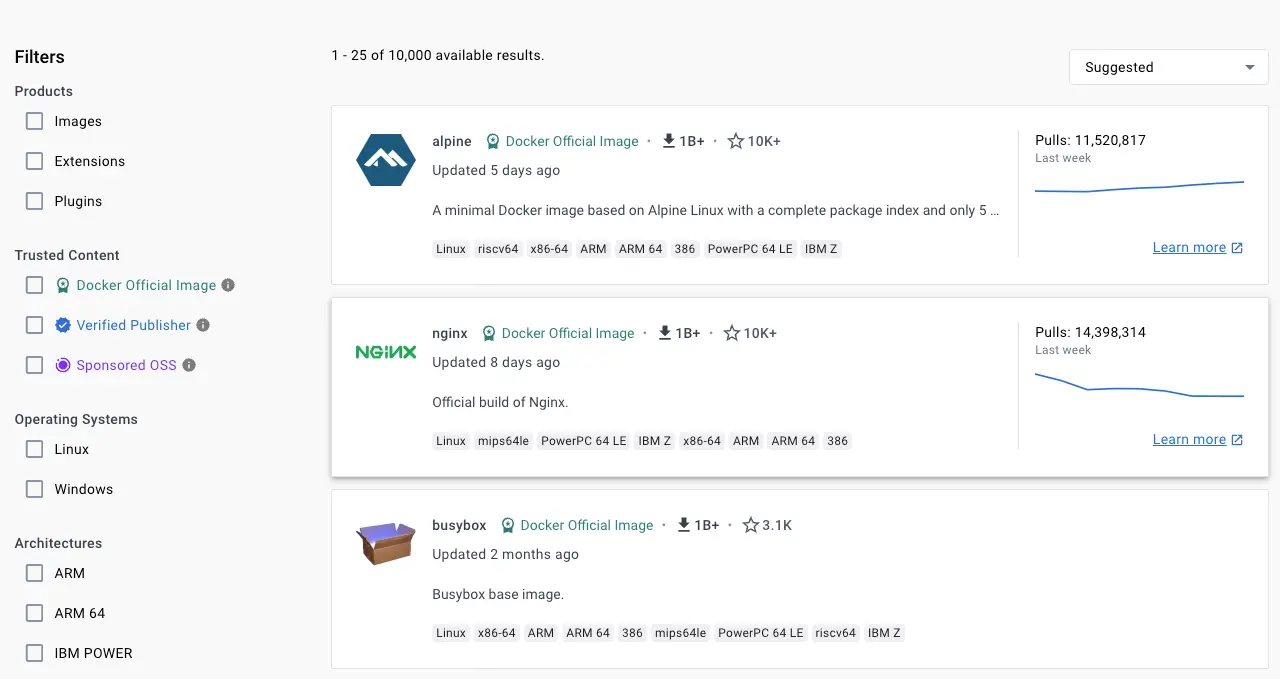
The first step towards achieving a secure image is to choose the right base image. When choosing an image, ensure it's built from a trusted source and keep it small.
Docker Official Images are a curated collection that have clear documentation, promote best practices, and are regularly updated. They provide a trusted starting point for many applications.
Verified Publisher images are high-quality images published and maintained by the organizations partnering with Docker, with Docker verifying the authenticity of the content in their repositories.
Docker-Sponsored Open Source are published and maintained by open source projects sponsored by Docker through an open source program.
When you pick your base image, look out for the badges indicating that the image is part of these programs.
When building your own image from a Dockerfile, ensure you choose a minimal base image that matches your requirements. A smaller base image not only offers portability and fast downloads, but also shrinks the size of your image and minimizes the number of vulnerabilities introduced through the dependencies.
You should also consider using two types of base image: one for building and unit testing, and another (typically slimmer) image for production. In the later stages of development, your image may not require build tools such as compilers, build systems, and debugging tools. A small image with minimal dependencies can considerably lower the attack surface.
Rebuild your images often
Docker images are immutable. Building an image is taking a snapshot of that image at that moment. That includes any base images, libraries, or other software you use in your build. To keep your images up-to-date and secure, rebuild your images regularly with updated dependencies.
Use --pull to get fresh base images
The following Dockerfile uses the 24.04 tag of the ubuntu image.
Over time, that tag may resolve to a different underlying version of the
ubuntu image, as the publisher rebuilds the image with new security
patches and updated libraries.
# syntax=docker/dockerfile:1
FROM ubuntu:24.04
RUN apt-get -y update && apt-get install -y --no-install-recommends python3
To get the latest version of the base image, use the --pull flag:
$ docker build --pull -t my-image:my-tag .
The --pull flag forces Docker to check for and download a newer
version of the base image, even if you have a version cached locally.
Use --no-cache for clean builds
The --no-cache flag disables the build cache, forcing Docker to
rebuild all layers from scratch:
$ docker build --no-cache -t my-image:my-tag .
This gets the latest available versions of dependencies from package
managers like apt-get or npm. It does not pull a fresh base image —
for that, use --pull.
The two flags serve distinct purposes and can be combined. Use both together to get a fresh base image and re-execute all build steps:
$ docker build --pull --no-cache -t my-image:my-tag .
Also consider pinning base image versions.
Exclude with .dockerignore
To exclude files not relevant to the build, without restructuring your source
repository, use a .dockerignore file. This file supports exclusion patterns
similar to .gitignore files.
For example, to exclude all files with the .md extension:
*.mdFor information on creating one, see Dockerignore file.
Create ephemeral containers
The image defined by your Dockerfile should generate containers that are as ephemeral as possible. Ephemeral means that the container can be stopped and destroyed, then rebuilt and replaced with an absolute minimum set up and configuration.
Refer to Processes under The Twelve-factor App methodology to get a feel for the motivations of running containers in such a stateless fashion.
Don't install unnecessary packages
Avoid installing extra or unnecessary packages just because they might be nice to have. For example, you don’t need to include a text editor in a database image.
When you avoid installing extra or unnecessary packages, your images have reduced complexity, reduced dependencies, reduced file sizes, and reduced build times.
Decouple applications
Each container should have only one concern. Decoupling applications into multiple containers makes it easier to scale horizontally and reuse containers. For instance, a web application stack might consist of three separate containers, each with its own unique image, to manage the web application, database, and an in-memory cache in a decoupled manner.
Limiting each container to one process is a good rule of thumb, but it's not a hard and fast rule. For example, not only can containers be spawned with an init process, some programs might spawn additional processes of their own accord. For instance, Celery can spawn multiple worker processes, and Apache can create one process per request.
Use your best judgment to keep containers as clean and modular as possible. If containers depend on each other, you can use Docker container networks to ensure that these containers can communicate.
Sort multi-line arguments
Whenever possible, sort multi-line arguments alphanumerically to make maintenance easier.
This helps to avoid duplication of packages and make the
list much easier to update. This also makes PRs a lot easier to read and
review. Adding a space before a backslash (\) helps as well.
Here’s an example from the buildpack-deps image:
RUN apt-get update && apt-get install -y --no-install-recommends \
  bzr \
  cvs \
  git \
  mercurial \
  subversion \
  && rm -rf /var/lib/apt/lists/*
Leverage build cache
When building an image, Docker steps through the instructions in your Dockerfile, executing each in the order specified. For each instruction, Docker checks whether it can reuse the instruction from the build cache.
Understanding how the build cache works, and how cache invalidation occurs, is critical for ensuring faster builds. For more information about the Docker build cache and how to optimize your builds, see Docker build cache.
Pin base image versions
Image tags are mutable, meaning a publisher can update a tag to point to a new image. This is useful because it lets publishers update tags to point to newer versions of an image. And as an image consumer, it means you automatically get the new version when you re-build your image.
For example, if you specify FROM alpine:3.21 in your Dockerfile, 3.21
resolves to the latest patch version for 3.21.
# syntax=docker/dockerfile:1
FROM alpine:3.21
At one point in time, the 3.21 tag might point to version 3.21.1 of the
image. If you rebuild the image 3 months later, the same tag might point to a
different version, such as 3.21.4. This publishing workflow is best practice,
and most publishers use this tagging strategy, but it isn't enforced.
The downside with this is that you're not guaranteed to get the same for every build. This could result in breaking changes, and it means you also don't have an audit trail of the exact image versions that you're using.
To fully secure your supply chain integrity, you can pin the image version to a
specific digest. By pinning your images to a digest, you're guaranteed to
always use the same image version, even if a publisher replaces the tag with a
new image. For example, the following Dockerfile pins the Alpine image to the
same tag as earlier, 3.21, but this time with a digest reference as well.
# syntax=docker/dockerfile:1
FROM alpine:3.21@sha256:a8560b36e8b8210634f77d9f7f9efd7ffa463e380b75e2e74aff4511df3ef88c
With this Dockerfile, even if the publisher updates the 3.21 tag, your builds
would still use the pinned image version:
a8560b36e8b8210634f77d9f7f9efd7ffa463e380b75e2e74aff4511df3ef88c.
While this helps you avoid unexpected changes, it's also more tedious to have to look up and include the image digest for base image versions manually each time you want to update it. And you're opting out of automated security fixes, which is likely something you want to get.
Docker Scout's default Up-to-Date Base Images policy checks whether the base image version you're using is in fact the latest version. This policy also checks if pinned digests in your Dockerfile correspond to the correct version. If a publisher updates an image that you've pinned, the policy evaluation returns a non-compliant status, indicating that you should update your image.
Docker Scout also supports an automated remediation workflow for keeping your base images up-to-date. When a new image digest is available, Docker Scout can automatically raise a pull request on your repository to update your Dockerfiles to use the latest version. This is better than using a tag that changes the version automatically, because you're in control and you have an audit trail of when and how the change occurred.
For more information about automatically updating your base images with Docker Scout, see Remediation.
Build and test your images in CI
When you check in a change to source control or create a pull request, use GitHub Actions or another CI/CD pipeline to automatically build and tag a Docker image and test it.
Dockerfile instructions
Follow these recommendations on how to properly use the Dockerfile instructions to create an efficient and maintainable Dockerfile.
TipTo improve linting, code navigation, and vulnerability scanning of your Dockerfiles in Visual Studio Code see the Docker DX extension.
FROM
Whenever possible, use current official images as the basis for your images. Docker recommends the Alpine image as it is tightly controlled and small in size (under 6 MB), while still being a full Linux distribution.
For more information about the FROM instruction, see
Dockerfile reference for the FROM instruction.
LABEL
You can add labels to your image to help organize images by project, record
licensing information, to aid in automation, or for other reasons. For each
label, add a line beginning with LABEL with one or more key-value pairs.
The following examples show the different acceptable formats. Explanatory comments are included inline.
Strings with spaces must be quoted or the spaces must be escaped. Inner
quote characters ("), must also be escaped. For example:
# Set one or more individual labels
LABEL com.example.version="0.0.1-beta"
LABEL vendor1="ACME Incorporated"
LABEL vendor2=ZENITH\ Incorporated
LABEL com.example.release-date="2015-02-12"
LABEL com.example.version.is-production=""
An image can have more than one label. Prior to Docker 1.10, it was recommended
to combine all labels into a single LABEL instruction, to prevent extra layers
from being created. This is no longer necessary, but combining labels is still
supported. For example:
# Set multiple labels on one line
LABEL com.example.version="0.0.1-beta" com.example.release-date="2015-02-12"
The above example can also be written as:
# Set multiple labels at once, using line-continuation characters to break long lines
LABEL vendor=ACME\ Incorporated \
      com.example.is-beta= \
      com.example.is-production="" \
      com.example.version="0.0.1-beta" \
      com.example.release-date="2015-02-12"
See Understanding object labels for guidelines about acceptable label keys and values. For information about querying labels, refer to the items related to filtering in Managing labels on objects. See also LABEL in the Dockerfile reference.
RUN
Split long or complex RUN statements on multiple lines separated with
backslashes to make your Dockerfile more readable, understandable, and
maintainable.
For example, you can chain commands with the && operator, and use
escape characters to break long commands into multiple lines.
RUN apt-get update && apt-get install -y --no-install-recommends \
    package-bar \
    package-baz \
    package-foo
By default, backslash escapes a newline character, but you can change it with
the
escape directive.
You can also use here documents to run multiple commands without chaining them with a pipeline operator:
RUN <<EOF
apt-get update
apt-get install -y --no-install-recommends \
    package-bar \
    package-baz \
    package-foo
EOF
For more information about RUN, see
Dockerfile reference for the RUN instruction.
apt-get
One common use case for RUN instructions in Debian-based images is to install
software using apt-get. Because apt-get installs packages, the RUN apt-get command has several counter-intuitive behaviors to look out for.
Always combine RUN apt-get update with apt-get install in the same RUN
statement. For example:
RUN apt-get update && apt-get install -y --no-install-recommends \
    package-bar \
    package-baz \
    package-foo
Using apt-get update alone in a RUN statement causes caching issues and
subsequent apt-get install instructions to fail. For example, this issue will occur in the following Dockerfile:
# syntax=docker/dockerfile:1

FROM ubuntu:22.04
RUN apt-get update
RUN apt-get install -y --no-install-recommends curl
After building the image, all layers are in the Docker cache. Suppose you later
modify apt-get install by adding an extra package as shown in the following Dockerfile:
# syntax=docker/dockerfile:1

FROM ubuntu:22.04
RUN apt-get update
RUN apt-get install -y --no-install-recommends curl nginx
Docker sees the initial and modified instructions as identical and reuses the
cache from previous steps. As a result the apt-get update isn't executed
because the build uses the cached version. Because the apt-get update isn't
run, your build can potentially get an outdated version of the curl and
nginx packages.
Using RUN apt-get update && apt-get install -y --no-install-recommends ensures your Dockerfile
installs the latest package versions with no further coding or manual
intervention. This technique is known as cache busting. You can also achieve
cache busting by specifying a package version. This is known as version pinning.
For example:
RUN apt-get update && apt-get install -y --no-install-recommends \
    package-bar \
    package-baz \
    package-foo=1.3.*
Version pinning forces the build to retrieve a particular version regardless of what’s in the cache. This technique can also reduce failures due to unanticipated changes in required packages.
Below is a well-formed RUN instruction that demonstrates all the apt-get
recommendations.
RUN apt-get update && apt-get install -y --no-install-recommends \
    aufs-tools \
    automake \
    build-essential \
    curl \
    dpkg-sig \
    libcap-dev \
    libsqlite3-dev \
    mercurial \
    reprepro \
    ruby1.9.1 \
    ruby1.9.1-dev \
    s3cmd=1.1.* \
    && rm -rf /var/lib/apt/lists/*
The s3cmd argument specifies a version 1.1.*. If the image previously
used an older version, specifying the new one causes a cache bust of apt-get update and ensures the installation of the new version. Listing packages on
each line can also prevent mistakes in package duplication.
In addition, when you clean up the apt cache by removing /var/lib/apt/lists it
reduces the image size, since the apt cache isn't stored in a layer. Since the
RUN statement starts with apt-get update, the package cache is always
refreshed prior to apt-get install.
Official Debian and Ubuntu images automatically run apt-get clean, so explicit invocation is not required.
Using pipes
Some RUN commands depend on the ability to pipe the output of one command into another, using the pipe character (|), as in the following example:
RUN wget -O - https://some.site | wc -l > /numberDocker executes these commands using the /bin/sh -c interpreter, which only
evaluates the exit code of the last operation in the pipe to determine success.
In the example above, this build step succeeds and produces a new image so long
as the wc -l command succeeds, even if the wget command fails.
If you want the command to fail due to an error at any stage in the pipe,
prepend set -o pipefail && to ensure that an unexpected error prevents the
build from inadvertently succeeding. For example:
RUN set -o pipefail && wget -O - https://some.site | wc -l > /numberNoteNot all shells support the
-o pipefailoption.In cases such as the
dashshell on Debian-based images, consider using the exec form ofRUNto explicitly choose a shell that does support thepipefailoption. For example:RUN ["/bin/bash", "-c", "set -o pipefail && wget -O - https://some.site | wc -l > /number"]
CMD
The CMD instruction should be used to run the software contained in your
image, along with any arguments. CMD should almost always be used in the form
of CMD ["executable", "param1", "param2"]. Thus, if the image is for a
service, such as Apache and Rails, you would run something like CMD ["apache2","-DFOREGROUND"]. Indeed, this form of the instruction is recommended
for any service-based image.
In most other cases, CMD should be given an interactive shell, such as bash,
Python and perl. For example, CMD ["perl", "-de0"], CMD ["python"], or CMD ["php", "-a"]. Using this form means that when you execute something like
docker run -it python, you’ll get dropped into a usable shell, ready to go.
CMD should rarely be used in the manner of CMD ["param", "param"] in
conjunction with
ENTRYPOINT, unless
you and your expected users are already quite familiar with how ENTRYPOINT
works.
For more information about CMD, see
Dockerfile reference for the CMD instruction.
EXPOSE
The EXPOSE instruction indicates the ports on which a container listens
for connections. Consequently, you should use the common, traditional port for
your application. For example, an image containing the Apache web server would
use EXPOSE 80, while an image containing MongoDB would use EXPOSE 27017 and
so on.
For external access, your users can execute docker run with a flag indicating
how to map the specified port to the port of their choice.
For container linking, Docker provides environment variables for the path from
the recipient container back to the source (for example, MYSQL_PORT_3306_TCP).
For more information about EXPOSE, see
Dockerfile reference for the EXPOSE instruction.
ENV
To make new software easier to run, you can use ENV to update the
PATH environment variable for the software your container installs. For
example, ENV PATH=/usr/local/nginx/bin:$PATH ensures that CMD ["nginx"]
just works.
The ENV instruction is also useful for providing the required environment
variables specific to services you want to containerize, such as Postgres’s
PGDATA.
Lastly, ENV can also be used to set commonly used version numbers so that
version bumps are easier to maintain, as seen in the following example:
ENV PG_MAJOR=9.3
ENV PG_VERSION=9.3.4
RUN curl -SL https://example.com/postgres-$PG_VERSION.tar.xz | tar -xJC /usr/src/postgres && …
ENV PATH=/usr/local/postgres-$PG_MAJOR/bin:$PATH
Similar to having constant variables in a program, as opposed to hard-coding
values, this approach lets you change a single ENV instruction to
automatically bump the version of the software in your container.
Each ENV line creates a new intermediate layer, just like RUN commands. This
means that even if you unset the environment variable in a future layer, it
still persists in this layer and its value can be dumped. You can test this by
creating a Dockerfile like the following, and then building it.
# syntax=docker/dockerfile:1
FROM alpine
ENV ADMIN_USER="mark"
RUN echo $ADMIN_USER > ./mark
RUN unset ADMIN_USER
$ docker run --rm test sh -c 'echo $ADMIN_USER'
mark
To prevent this and unset the environment variable, use a RUN command
with shell commands, to set, use, and unset the variable all in a single layer.
You can separate your commands with ; or &&. If you use the second method,
and one of the commands fails, the docker build also fails. This is usually a
good idea. Using \ as a line continuation character for Linux Dockerfiles
improves readability. You could also put all of the commands into a shell script
and have the RUN command just run that shell script.
# syntax=docker/dockerfile:1
FROM alpine
RUN export ADMIN_USER="mark" \
    && echo $ADMIN_USER > ./mark \
    && unset ADMIN_USER
CMD sh
$ docker run --rm test sh -c 'echo $ADMIN_USER'
For more information about ENV, see
Dockerfile reference for the ENV instruction.
ADD or COPY
ADD and COPY are functionally similar. COPY supports basic copying of
files into the container, from the
build context
or from a stage in a
multi-stage build.
ADD supports features for fetching files from remote HTTPS and Git URLs, and
extracting tar files automatically when adding files from the build context.
You'll mostly want to use COPY for copying files from one stage to another in
a multi-stage build. If you need to add files from the build context to the
container temporarily to execute a RUN instruction, you can often substitute
the COPY instruction with a bind mount instead. For example, to temporarily
add a requirements.txt file for a RUN pip install instruction:
RUN --mount=type=bind,source=requirements.txt,target=/tmp/requirements.txt \
    pip install --requirement /tmp/requirements.txt
Bind mounts are more efficient than COPY for including files from the build
context in the container. Note that bind-mounted files are only added
temporarily for a single RUN instruction, and don't persist in the final
image. If you need to include files from the build context in the final image,
use COPY.
The ADD instruction is best for when you need to download a remote artifact
as part of your build. ADD is better than manually adding files using
something like wget and tar, because it ensures a more precise build cache.
ADD also has built-in support for checksum validation of the remote
resources, and a protocol for parsing branches, tags, and subdirectories from
Git URLs.
The following example uses ADD to download a .NET installer. Combined with
multi-stage builds, only the .NET runtime remains in the final stage, no
intermediate files.
# syntax=docker/dockerfile:1

FROM scratch AS src
ARG DOTNET_VERSION=8.0.0-preview.6.23329.7
ADD --checksum=sha256:270d731bd08040c6a3228115de1f74b91cf441c584139ff8f8f6503447cebdbb \
    https://dotnetcli.azureedge.net/dotnet/Runtime/$DOTNET_VERSION/dotnet-runtime-$DOTNET_VERSION-linux-arm64.tar.gz /dotnet.tar.gz

FROM mcr.microsoft.com/dotnet/runtime-deps:8.0.0-preview.6-bookworm-slim-arm64v8 AS installer

# Retrieve .NET Runtime
RUN --mount=from=src,target=/src <<EOF
mkdir -p /dotnet
tar -oxzf /src/dotnet.tar.gz -C /dotnet
EOF

FROM mcr.microsoft.com/dotnet/runtime-deps:8.0.0-preview.6-bookworm-slim-arm64v8

COPY --from=installer /dotnet /usr/share/dotnet
RUN ln -s /usr/share/dotnet/dotnet /usr/bin/dotnet
For more information about ADD or COPY, see the following:
ENTRYPOINT
The best use for ENTRYPOINT is to set the image's main command, allowing that
image to be run as though it was that command, and then use CMD as the
default flags.
The following is an example of an image for the command line tool s3cmd:
ENTRYPOINT ["s3cmd"]
CMD ["--help"]
You can use the following command to run the image and show the command's help:
$ docker run s3cmd
Or, you can use the right parameters to execute a command, like in the following example:
$ docker run s3cmd ls s3://mybucket
This is useful because the image name can double as a reference to the binary as shown in the command above.
The ENTRYPOINT instruction can also be used in combination with a helper
script, allowing it to function in a similar way to the command above, even
when starting the tool may require more than one step.
For example, the Postgres Official Image
uses the following script as its ENTRYPOINT:
#!/bin/sh
set -e

if [ "$1" = 'postgres' ]; then
    chown -R postgres "$PGDATA"

    if [ -z "$(ls -A "$PGDATA")" ]; then
        gosu postgres initdb
    fi

    exec gosu postgres "$@"
fi

exec "$@"
This script uses the exec builtin so that the final running application becomes the container's PID 1. This allows the application to receive any Unix signals sent to the container. For more information, see the
ENTRYPOINT reference.
In the following example, a helper script is copied into the container and run via ENTRYPOINT on
container start:
COPY ./docker-entrypoint.sh /
ENTRYPOINT ["/docker-entrypoint.sh"]
CMD ["postgres"]
This script lets you interact with Postgres in several ways.
It can simply start Postgres:
$ docker run postgres
Or, you can use it to run Postgres and pass parameters to the server:
$ docker run postgres postgres --help
Lastly, you can use it to start a totally different tool, such as Bash:
$ docker run --rm -it postgres bash
For more information about ENTRYPOINT, see
Dockerfile reference for the ENTRYPOINT instruction.
VOLUME
You should use the VOLUME instruction to expose any database storage area,
configuration storage, or files and folders created by your Docker container. You
are strongly encouraged to use VOLUME for any combination of mutable or user-serviceable
parts of your image.
For more information about VOLUME, see
Dockerfile reference for the VOLUME instruction.
USER
If a service can run without privileges, use USER to change to a non-root
user. Start by creating the user and group in the Dockerfile with something
like the following example:
RUN groupadd -r postgres && useradd --no-log-init -r -g postgres postgresNoteConsider an explicit UID/GID.
Users and groups in an image are assigned a non-deterministic UID/GID in that the "next" UID/GID is assigned regardless of image rebuilds. So, if it’s critical, you should assign an explicit UID/GID.
NoteDue to an unresolved bug in the Go archive/tar package's handling of sparse files, attempting to create a user with a significantly large UID inside a Docker container can lead to disk exhaustion because
/var/log/faillogin the container layer is filled with NULL (\0) characters. A workaround is to pass the--no-log-initflag touseradd. The Debian/Ubuntuadduserwrapper does not support this flag.
Avoid installing or using sudo as it has unpredictable TTY and
signal-forwarding behavior that can cause problems. If you absolutely need
functionality similar to sudo, such as initializing the daemon as root but
running it as non-root, consider using “gosu”.
Lastly, to reduce layers and complexity, avoid switching USER back and forth
frequently.
For more information about USER, see
Dockerfile reference for the USER instruction.
WORKDIR
For clarity and reliability, you should always use absolute paths for your
WORKDIR. Also, you should use WORKDIR instead of proliferating instructions
like RUN cd … && do-something, which are hard to read, troubleshoot, and
maintain.
For more information about WORKDIR, see
Dockerfile reference for the WORKDIR instruction.
ONBUILD
An ONBUILD command executes after the current Dockerfile build completes.
ONBUILD executes in any child image derived FROM the current image. Think
of the ONBUILD command as an instruction that the parent Dockerfile gives
to the child Dockerfile.
A Docker build executes ONBUILD commands before any command in a child
Dockerfile.
ONBUILD is useful for images that are going to be built FROM a given
image. For example, you would use ONBUILD for a language stack image that
builds arbitrary user software written in that language within the
Dockerfile, as you can see in Ruby’s ONBUILD variants.
Images built with ONBUILD should get a separate tag. For example,
ruby:1.9-onbuild or ruby:2.0-onbuild.
Be careful when putting ADD or COPY in ONBUILD. The image
fails catastrophically if the new build's context is missing the resource being
added. Adding a separate tag, as recommended above, helps mitigate this by
allowing the Dockerfile author to make a choice.
For more information about ONBUILD, see
Dockerfile reference for the ONBUILD instruction.