Configure a private marketplace for extensions
Learn how to configure and set up a private marketplace with a curated list of extensions for your Docker Desktop users.
Docker Extensions' private marketplace is designed specifically for organizations who don’t give developers root access to their machines. It makes use of Settings Management so administrators have complete control over the private marketplace.
Prerequisites
- Download and install Docker Desktop 4.26.0 or later.
- You must be an administrator for your organization.
- You have the ability to push the
extension-marketplacefolder andadmin-settings.jsonfile to the locations specified below through device management software such as Jamf.
Step one: Initialize the private marketplace
Create a folder locally for the content that will be deployed to your developers’ machines:
$ mkdir my-marketplace
$ cd my-marketplace
Initialize the configuration files for your marketplace:
$ /Applications/Docker.app/Contents/Resources/bin/extension-admin init$ C:\Program Files\Docker\Docker\resources\bin\extension-admin init$ /opt/docker-desktop/extension-admin init
This creates 2 files:
admin-settings.json, which activates the private marketplace feature once it’s applied to Docker Desktop on your developers’ machines.extensions.txt, which determines which extensions to list in your private marketplace.
ImportantIf your org is using Settings Management via the Admin Console, you will not need the
admins-settings.jsonfile. Delete the generated file and keep only theextensions.txtfile.
Step two: Set the behaviour
The generated admin-settings.json file includes various settings you can modify.
ImportantIf your org is managing settings via the Admin Console, you will define the same settings in the Admin Console instead of the
admin-settings.jsonfile.
Each setting has a value that you can set, including a locked field that lets you lock the setting and make it unchangeable by your developers.
extensionsEnabledenables Docker Extensions.extensionsPrivateMarketplaceactivates the private marketplace and ensures Docker Desktop connects to content defined and controlled by the administrator instead of the public Docker marketplace.onlyMarketplaceExtensionsallows or blocks developers from installing other extensions by using the command line. Teams developing new extensions must have this setting unlocked ("locked": false) to install and test extensions being developed.extensionsPrivateMarketplaceAdminContactURLdefines a contact link for developers to request new extensions in the private marketplace. Ifvalueis empty then no link is shown to your developers on Docker Desktop, otherwise this can be either an HTTP link or a “mailto:” link. For example,"extensionsPrivateMarketplaceAdminContactURL": { "locked": true, "value": "mailto:admin@acme.com" }
To find out more information about the admin-settings.json file, see
Settings Management.
Step three: List allowed extensions
The generated extensions.txt file defines the list of extensions that are available in your private marketplace.
Each line in the file is an allowed extension and follows the format of org/repo:tag.
For example, if you want to permit the Disk Usage extension you would enter the following into your extensions.txt file:
docker/disk-usage-extension:0.2.8
If no tag is provided, the latest tag available for the image is used. You can also comment out lines with # so the extension is ignored.
This list can include different types of extension images:
- Extensions from the public marketplace or any public image stored in Docker Hub.
- Extension images stored in Docker Hub as private images. Developers need to be signed in and have pull access to these images.
- Extension images stored in a private registry. Developers need to be signed in and have pull access to these images.
ImportantYour developers can only install the version of the extension that you’ve listed.
Step four: Generate the private marketplace
Once the list in extensions.txt is ready, you can generate the marketplace:
$ /Applications/Docker.app/Contents/Resources/bin/extension-admin generate
$ C:\Program Files\Docker\Docker\resources\bin\extension-admin generate
$ /opt/docker-desktop/extension-admin generate
This creates an extension-marketplace directory and downloads the marketplace metadata for all the allowed extensions.
The marketplace content is generated from extension image information as image labels, which is the same format as public extensions. It includes the extension title, description, screenshots, links, etc.
Step five: Test the private marketplace setup
It's recommended that you try the private marketplace on your Docker Desktop installation.
Run the following command in your terminal. This command automatically copies the generated files to the location where Docker Desktop reads the configuration files. Depending on your operating system, the location is:
- Mac:
/Library/Application\ Support/com.docker.docker - Windows:
C:\ProgramData\DockerDesktop - Linux:
/usr/share/docker-desktop
$ sudo /Applications/Docker.app/Contents/Resources/bin/extension-admin apply$ C:\Program Files\Docker\Docker\resources\bin\extension-admin apply$ sudo /opt/docker-desktop/extension-admin apply- Mac:
Quit and re-open Docker Desktop.
Sign in with a Docker account.
ImportantIf your org is managing settings via the Admin Console, with Docker Desktop version 4.59 and earlier you need to manually delete the
admin-settings.jsonfile that has been created in the target folder by theapplycommand before step 2.
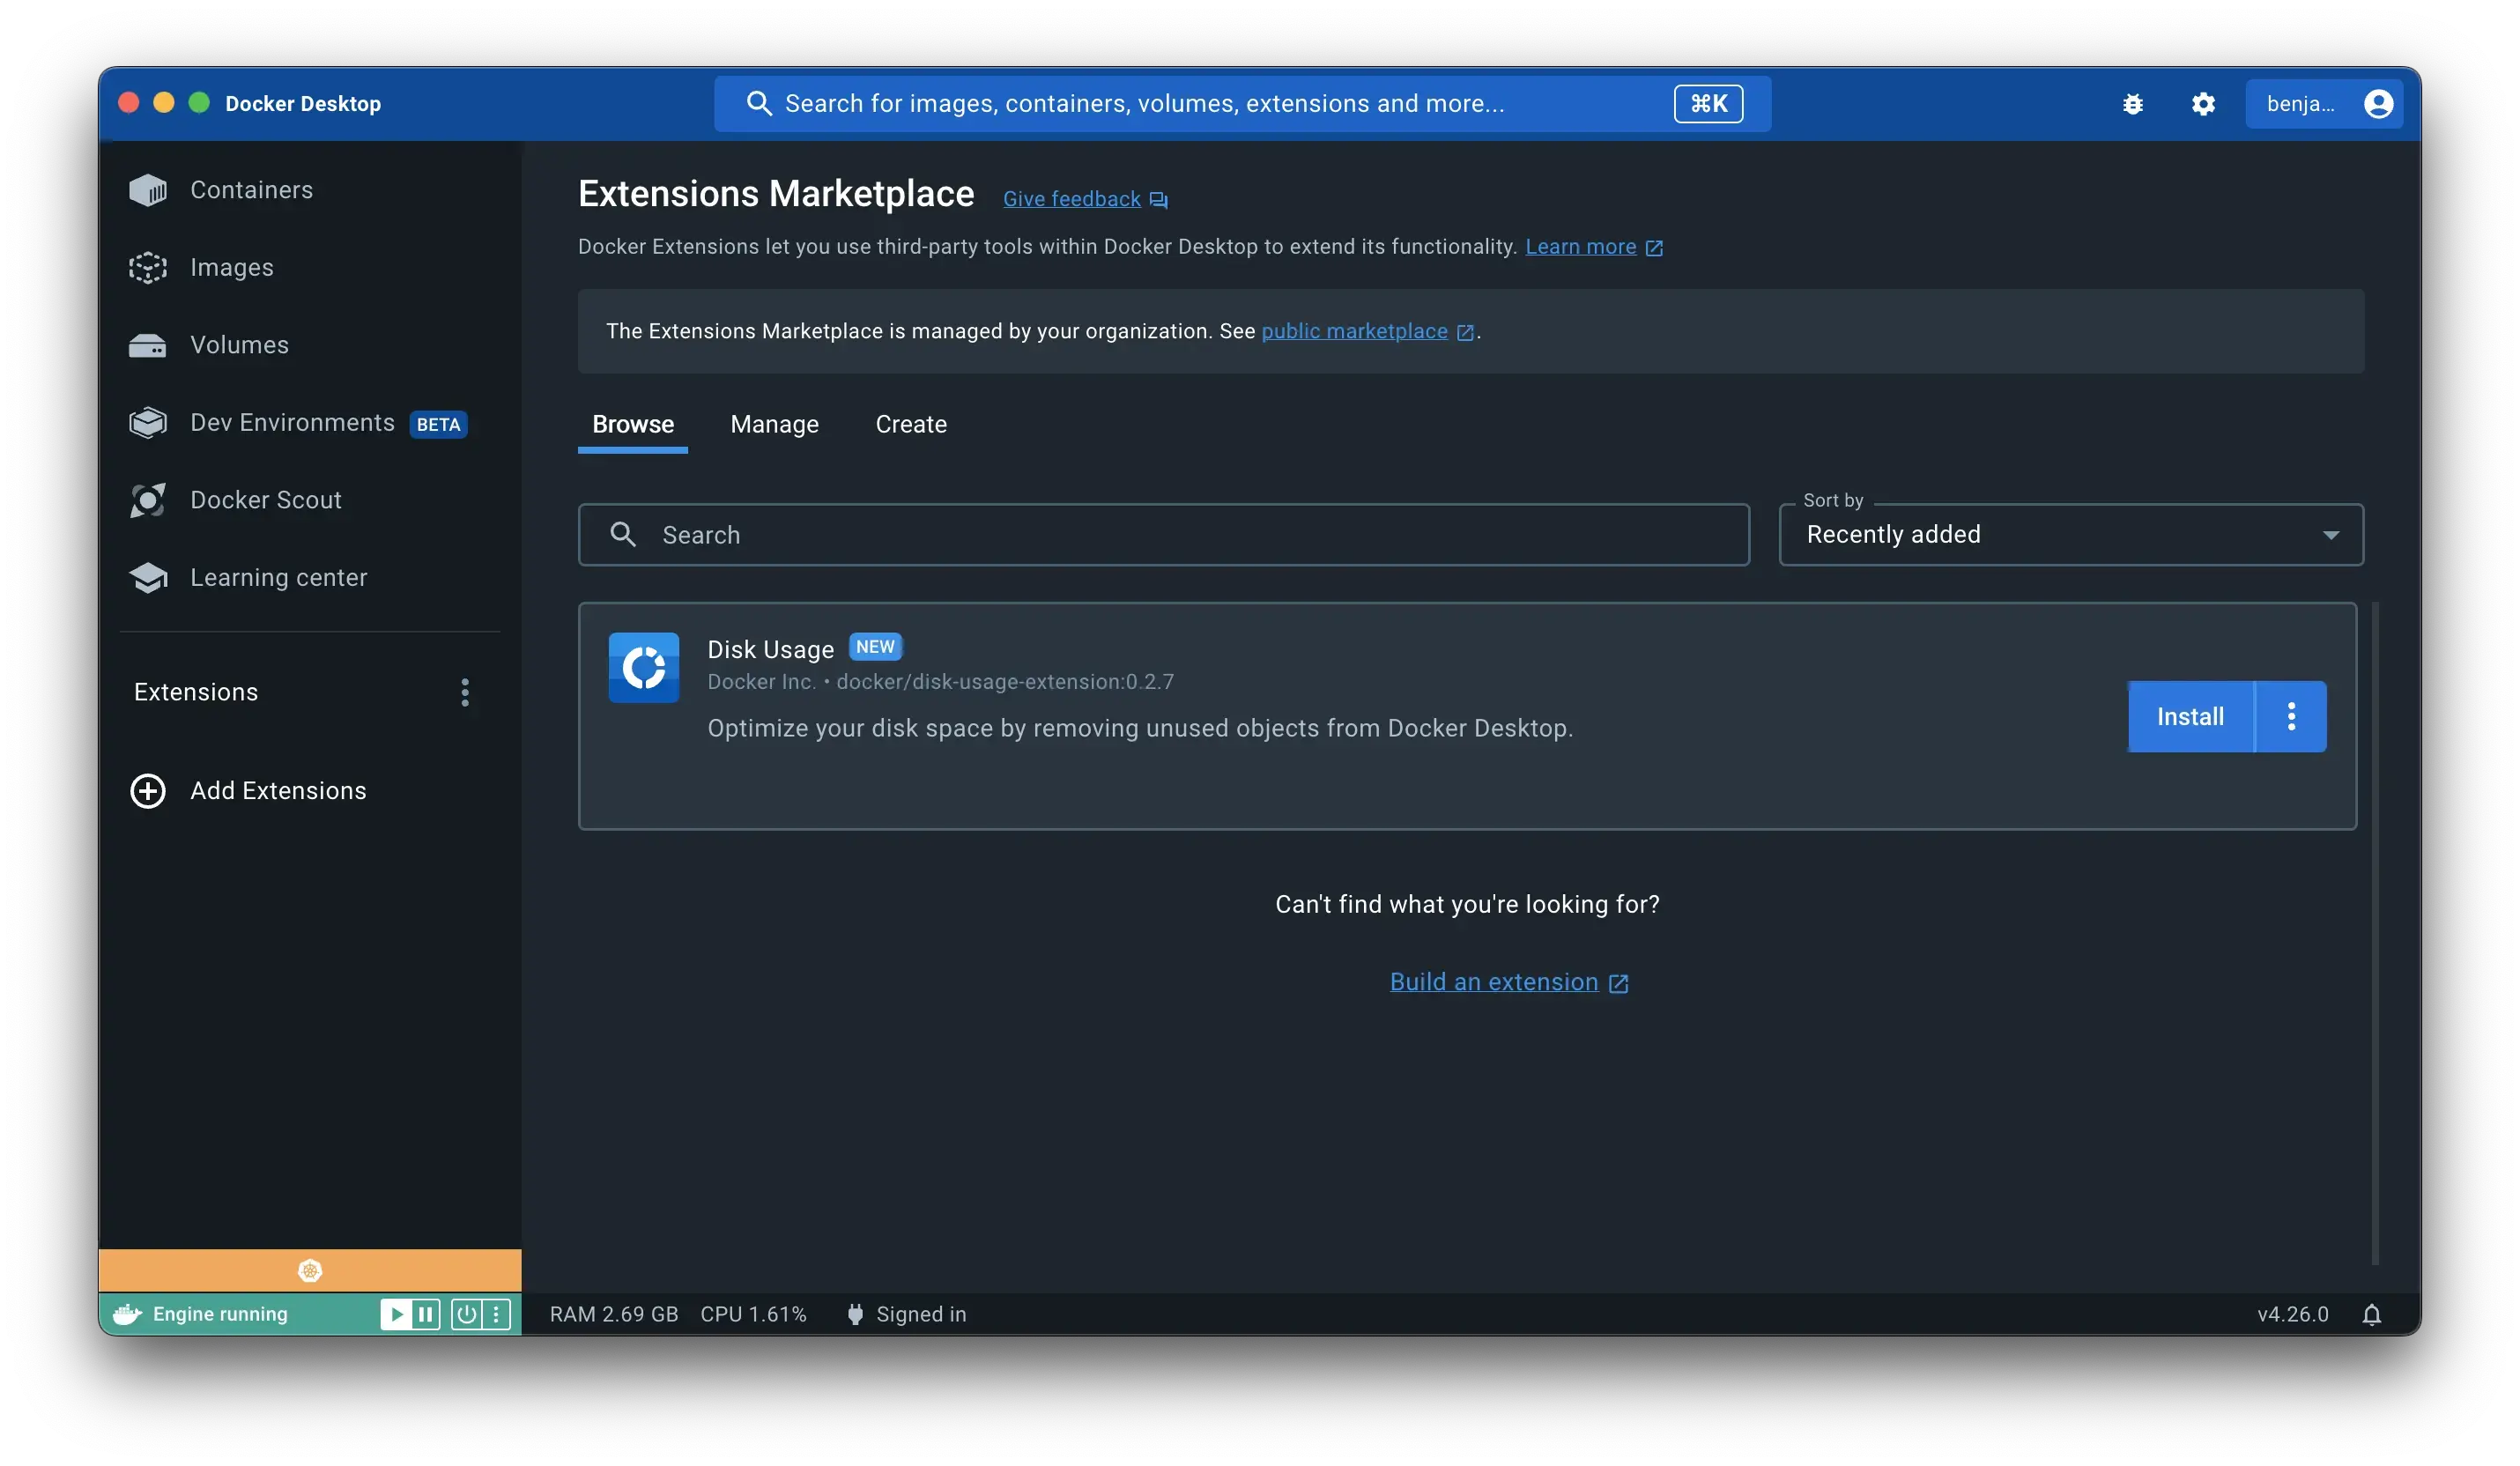
When you select the Extensions tab, you should see the private marketplace listing only the extensions you have allowed in extensions.txt.


Step six: Distribute the private marketplace
Once you’ve confirmed that the private marketplace configuration works, the final step is to distribute the files to the developers’ machines with the MDM software your organization uses. For example, Jamf.
The files to distribute are:
admin-settings.json(except if your org is managing settings via the Admin Console)- the entire
extension-marketplacefolder and its subfolders
These files must be placed on developer's machines. Depending on your operating system, the target location is (as mentioned above):
- Mac:
/Library/Application\ Support/com.docker.docker - Windows:
C:\ProgramData\DockerDesktop - Linux:
/usr/share/docker-desktop
Make sure your developers are signed in to Docker Desktop in order for the private marketplace configuration to take effect. As an administrator, you should enforce sign-in.
Feedback
Give feedback or report any bugs you may find by emailing extensions@docker.com.