Overriding container defaults
Explanation
When a Docker container starts, it executes an application or command. The container gets this executable (script or file) from its image’s configuration. Containers come with default settings that usually work well, but you can change them if needed. These adjustments help the container's program run exactly how you want it to.
For example, if you have an existing database container that listens on the standard port and you want to run a new instance of the same database container, then you might want to change the port settings the new container listens on so that it doesn’t conflict with the existing container. Sometimes you might want to increase the memory available to the container if the program needs more resources to handle a heavy workload or set the environment variables to provide specific configuration details the program needs to function properly.
The docker run command offers a powerful way to override these defaults and tailor the container's behavior to your liking. The command offers several flags that let you to customize container behavior on the fly.
Here's a few ways you can achieve this.
Overriding the network ports
Sometimes you might want to use separate database instances for development and testing purposes. Running these database instances on the same port might conflict. You can use the -p option in docker run to map container ports to host ports, allowing you to run the multiple instances of the container without any conflict.
$ docker run -d -p HOST_PORT:CONTAINER_PORT postgres
Setting environment variables
This option sets an environment variable foo inside the container with the value bar.
$ docker run -e foo=bar postgres env
You will see output like the following:
HOSTNAME=2042f2e6ebe4
foo=bar
TipThe
.envfile acts as a convenient way to set environment variables for your Docker containers without cluttering your command line with numerous-eflags. To use a.envfile, you can pass--env-fileoption with thedocker runcommand.$ docker run --env-file .env postgres env
Restricting the container to consume the resources
You can use the --memory and --cpus flags with the docker run command to restrict how much CPU and memory a container can use. For example, you can set a memory limit for the Python API container, preventing it from consuming excessive resources on your host. Here's the command:
$ docker run -e POSTGRES_PASSWORD=secret --memory="512m" --cpus="0.5" postgres
This command limits container memory usage to 512 MB and defines the CPU quota of 0.5 for half a core.
Monitor the real-time resource usage
You can use the
docker statscommand to monitor the real-time resource usage of running containers. This helps you understand whether the allocated resources are sufficient or need adjustment.
By effectively using these docker run flags, you can tailor your containerized application's behavior to fit your specific requirements.
Try it out
In this hands-on guide, you'll see how to use the docker run command to override the container defaults.
- Download and install Docker Desktop.
Run multiple instances of the Postgres database
Start a container using the Postgres image with the following command:
$ docker run -d -e POSTGRES_PASSWORD=secret -p 5432:5432 postgresThis will start the Postgres database in the background, listening on the standard container port
5432and mapped to port5432on the host machine.Start a second Postgres container mapped to a different port.
$ docker run -d -e POSTGRES_PASSWORD=secret -p 5433:5432 postgresThis will start another Postgres container in the background, listening on the standard postgres port
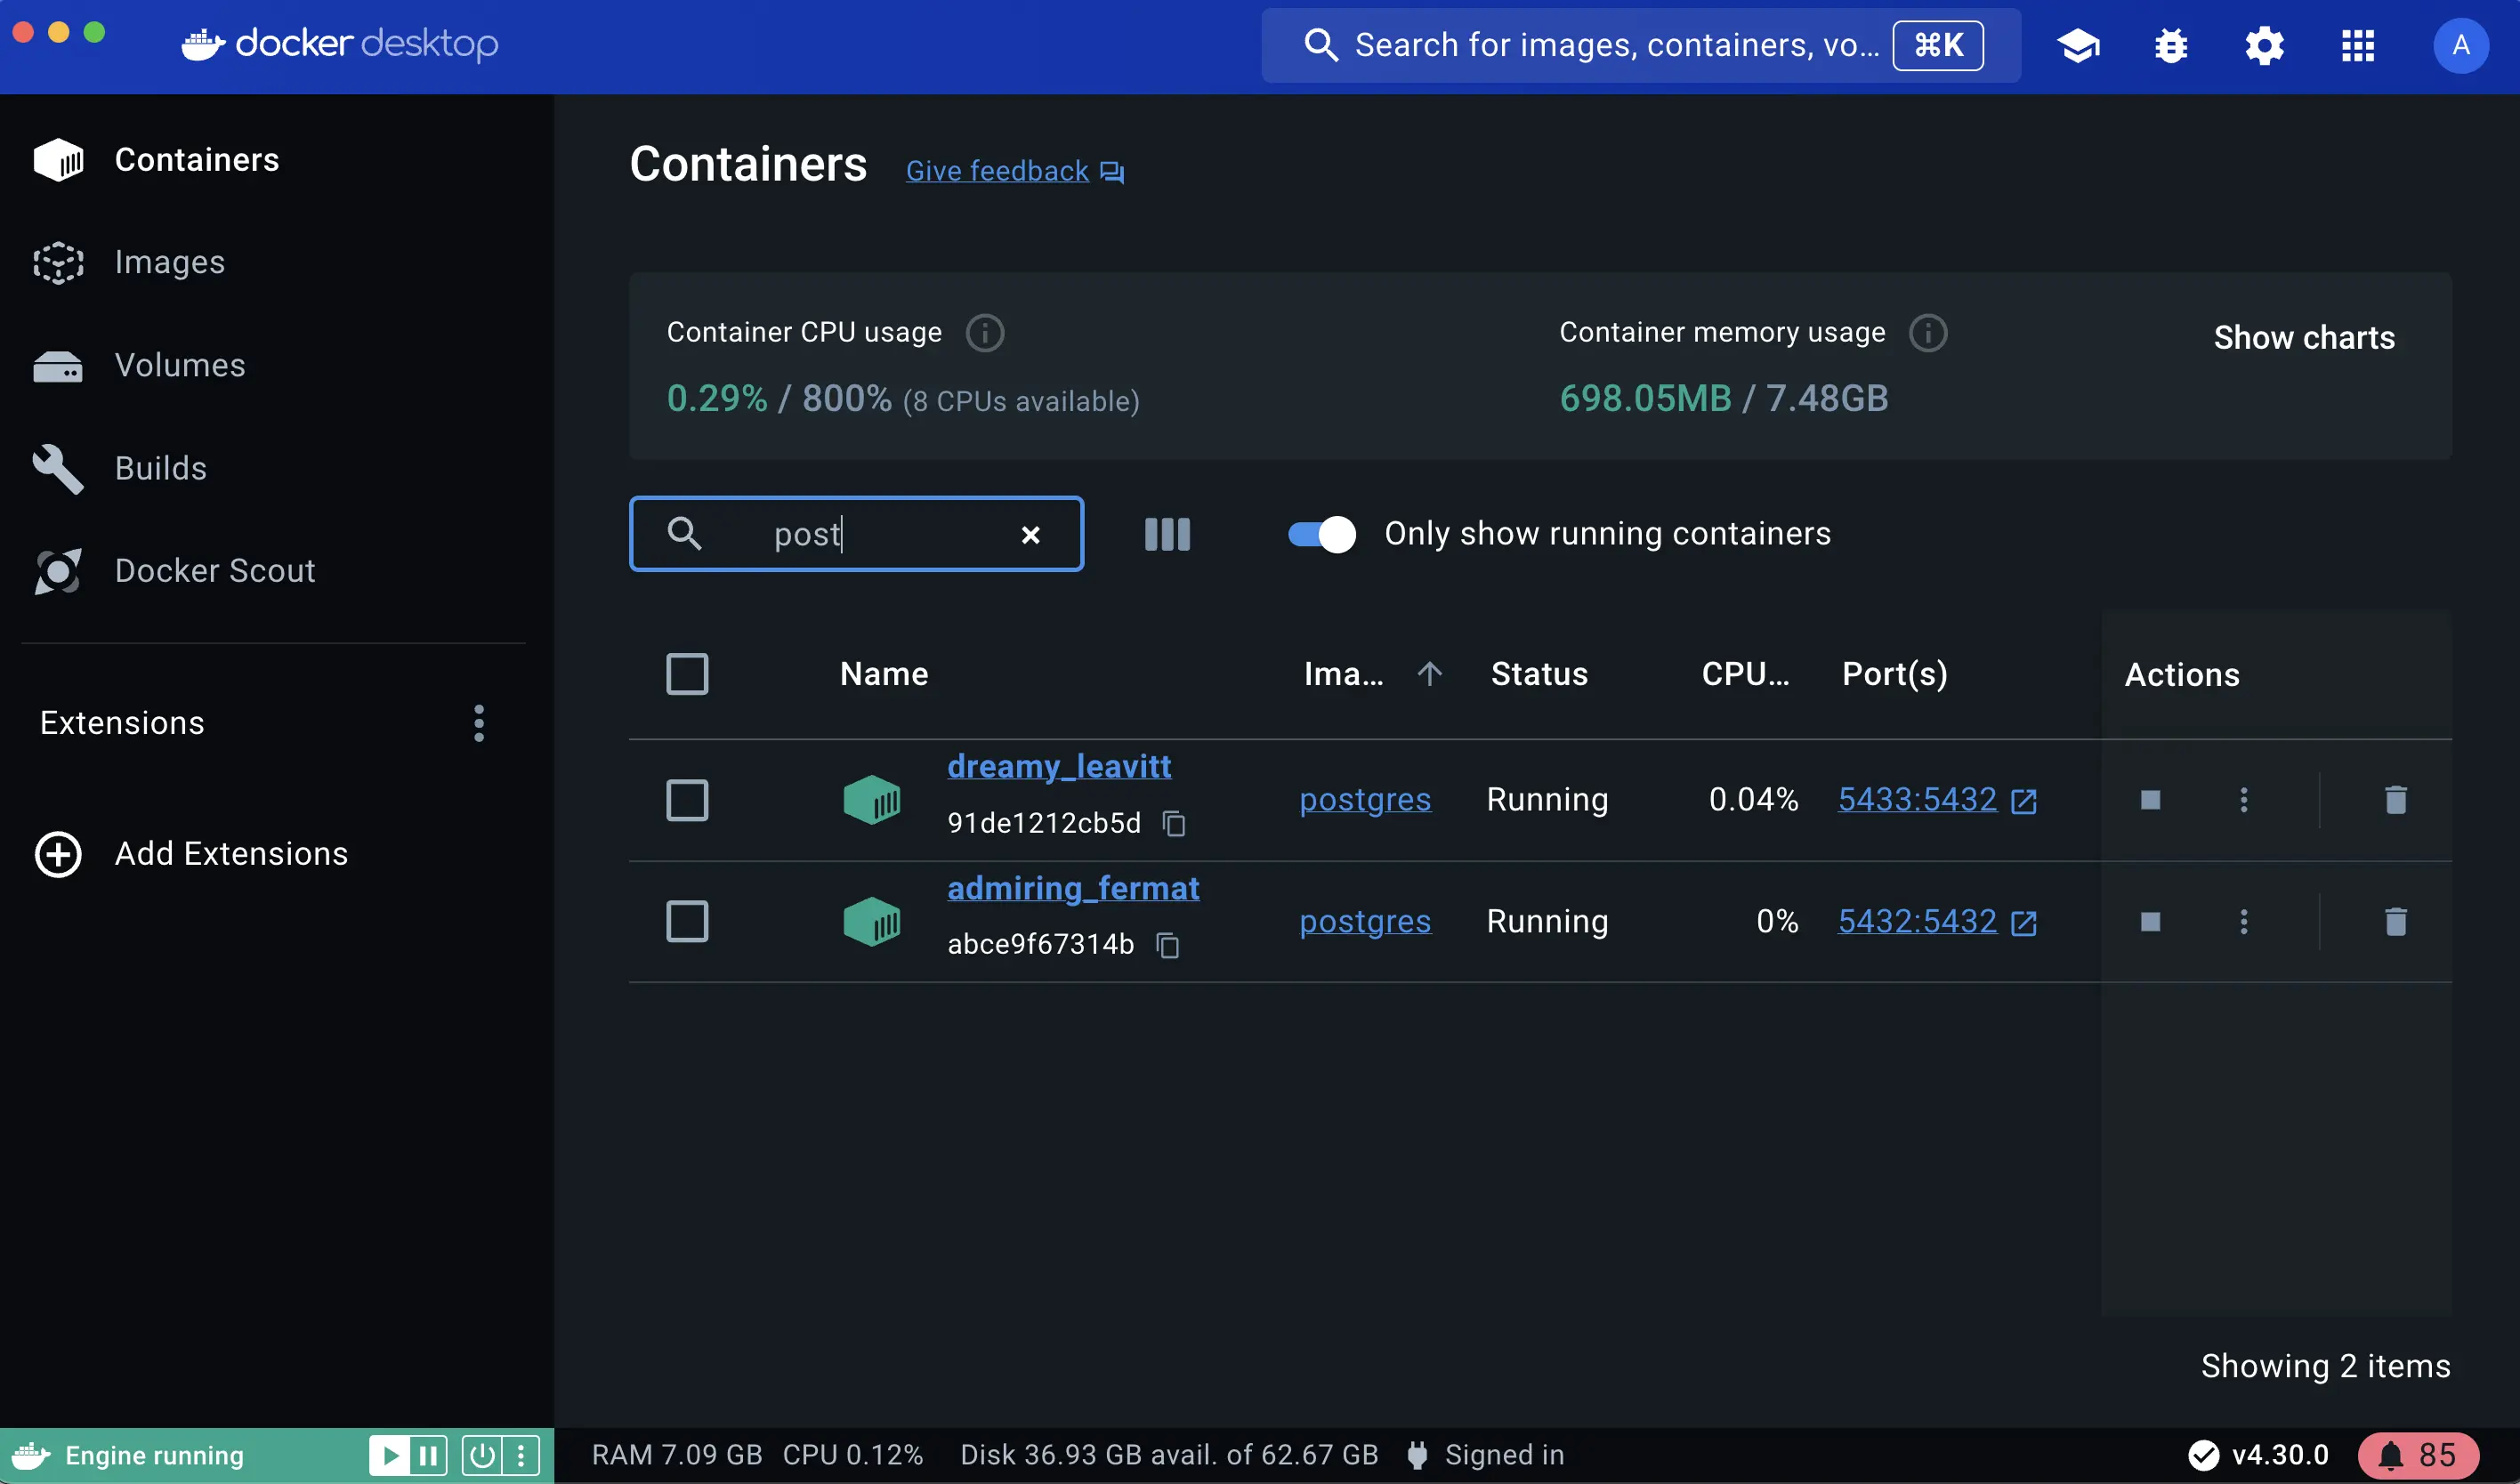
5432in the container, but mapped to port5433on the host machine. You override the host port just to ensure that this new container doesn't conflict with the existing running container.Verify that both containers are running by going to the Containers view in the Docker Desktop Dashboard.
Run Postgres container in a controlled network
By default, containers automatically connect to a special network called a bridge network when you run them. This bridge network acts like a virtual bridge, allowing containers on the same host to communicate with each other while keeping them isolated from the outside world and other hosts. It's a convenient starting point for most container interactions. However, for specific scenarios, you might want more control over the network configuration.
Here's where the custom network comes in. You create a custom network by passing --network flag with the docker run command. All containers without a --network flag are attached to the default bridge network.
Follow the steps to see how to connect a Postgres container to a custom network.
Create a new custom network by using the following command:
$ docker network create mynetworkVerify the network by running the following command:
$ docker network lsThis command lists all networks, including the newly created "mynetwork".
Connect Postgres to the custom network by using the following command:
$ docker run -d -e POSTGRES_PASSWORD=secret -p 5434:5432 --network mynetwork postgresThis will start Postgres container in the background, mapped to the host port 5434 and attached to the
mynetworknetwork. You passed the--networkparameter to override the container default by connecting the container to custom Docker network for better isolation and communication with other containers. You can usedocker network inspectcommand to see if the container is tied to this new bridge network.Key difference between default bridge and custom networks
- DNS resolution: By default, containers connected to the default bridge network can communicate with each other, but only by IP address. (unless you use
--linkoption which is considered legacy). It is not recommended for production use due to the various technical shortcomings. On a custom network, containers can resolve each other by name or alias. - Isolation: All containers without a
--networkspecified are attached to the default bridge network, hence can be a risk, as unrelated containers are then able to communicate. Using a custom network provides a scoped network in which only containers attached to that network are able to communicate, hence providing better isolation.
- DNS resolution: By default, containers connected to the default bridge network can communicate with each other, but only by IP address. (unless you use
Manage the resources
By default, containers are not limited in their resource usage. However, on shared systems, it's crucial to manage resources effectively. It's important not to let a running container consume too much of the host machine's memory.
This is where the docker run command shines again. It offers flags like --memory and --cpus to restrict how much CPU and memory a container can use.
$ docker run -d -e POSTGRES_PASSWORD=secret --memory="512m" --cpus=".5" postgres
The --cpus flag specifies the CPU quota for the container. Here, it's set to half a CPU core (0.5) whereas the --memory flag specifies the memory limit for the container. In this case, it's set to 512 MB.
Override the default CMD and ENTRYPOINT in Docker Compose
Sometimes, you might need to override the default commands (CMD) or entry points (ENTRYPOINT) defined in a Docker image, especially when using Docker Compose.
Create a
compose.ymlfile with the following content:services: postgres: image: postgres:18 entrypoint: ["docker-entrypoint.sh", "postgres"] command: ["-h", "localhost", "-p", "5432"] environment: POSTGRES_PASSWORD: secretThe Compose file defines a service named
postgresthat uses the official Postgres image, sets an entrypoint script, and starts the container with password authentication.Bring up the service by running the following command:
$ docker compose up -dThis command starts the Postgres service defined in the Docker Compose file.
Verify the authentication with Docker Desktop Dashboard.
Open the Docker Desktop Dashboard, select the Postgres container and select Exec to enter into the container shell. You can type the following command to connect to the Postgres database:
# psql -U postgres Note
NoteThe PostgreSQL image sets up trust authentication locally so you may notice a password isn't required when connecting from localhost (inside the same container). However, a password will be required if connecting from a different host/container.
Override the default CMD and ENTRYPOINT with docker run
You can also override defaults directly using the docker run command with the following command:
$ docker run -e POSTGRES_PASSWORD=secret postgres docker-entrypoint.sh -h localhost -p 5432
This command runs a Postgres container, sets an environment variable for password authentication, overrides the default startup commands and configures hostname and port mapping.
Additional resources
Next steps
Now that you have learned about overriding container defaults, it's time to learn how to persist container data.
Persisting container data