Sharing local files with containers
Explanation
Each container has everything it needs to function with no reliance on any pre-installed dependencies on the host machine. Since containers run in isolation, they have minimal influence on the host and other containers. This isolation has a major benefit: containers minimize conflicts with the host system and other containers. However, this isolation also means containers can't directly access data on the host machine by default.
Consider a scenario where you have a web application container that requires access to configuration settings stored in a file on your host system. This file may contain sensitive data such as database credentials or API keys. Storing such sensitive information directly within the container image poses security risks, especially during image sharing. To address this challenge, Docker offers storage options that bridge the gap between container isolation and your host machine's data.
Docker offers two primary storage options for persisting data and sharing files between the host machine and containers: volumes and bind mounts.
Volume versus bind mounts
If you want to ensure that data generated or modified inside the container persists even after the container stops running, you would opt for a volume. See Persisting container data to learn more about volumes and their use cases.
If you have specific files or directories on your host system that you want to directly share with your container, like configuration files or development code, then you would use a bind mount. It's like opening a direct portal between your host and container for sharing. Bind mounts are ideal for development environments where real-time file access and sharing between the host and container are crucial.
Sharing files between a host and container
Both -v (or --volume) and --mount flags used with the docker run command let you share files or directories between your local machine (host) and a Docker container. However, there are some key differences in their behavior and usage.
The -v flag is simpler and more convenient for basic volume or bind mount operations. If the host location doesn’t exist when using -v or --volume, a directory will be automatically created.
Imagine you're a developer working on a project. You have a source directory on your development machine where your code resides. When you compile or build your code, the generated artifacts (compiled code, executables, images, etc.) are saved in a separate subdirectory within your source directory. In the following examples, this subdirectory is /HOST/PATH. Now you want these build artifacts to be accessible within a Docker container running your application. Additionally, you want the container to automatically access the latest build artifacts whenever you rebuild your code.
Here's a way to use docker run to start a container using a bind mount and map it to the container file location.
$ docker run -v /HOST/PATH:/CONTAINER/PATH -it nginx
The --mount flag offers more advanced features and granular control, making it suitable for complex mount scenarios or production deployments. By default, if you use --mount to bind-mount a file or directory that doesn't yet exist on the Docker host, the docker run command doesn't automatically create it for you but generates an error.
$ docker run --mount type=bind,source=/HOST/PATH,target=/CONTAINER/PATH,readonly nginx
NoteDocker recommends using the
--mountsyntax instead of-v. It provides better control over the mounting process and avoids potential issues with missing directories.
File permissions for Docker access to host files
When using bind mounts, it's crucial to ensure that Docker has the necessary permissions to access the host directory. To grant read/write access, you can use the :ro flag (read-only) or :rw (read-write) with the -v or --mount flag during container creation.
For example, the following command grants read-write access permission.
$ docker run -v HOST-DIRECTORY:/CONTAINER-DIRECTORY:rw nginx
Read-only bind mounts let the container access the mounted files on the host for reading, but it can't change or delete the files. With read-write bind mounts, containers can modify or delete mounted files, and these changes or deletions will also be reflected on the host system. Read-only bind mounts ensures that files on the host can't be accidentally modified or deleted by a container.
Synchronized File Share
As your codebase grows larger, traditional methods of file sharing like bind mounts may become inefficient or slow, especially in development environments where frequent access to files is necessary. Synchronized file shares improve bind mount performance by leveraging synchronized filesystem caches. This optimization ensures that file access between the host and virtual machine (VM) is fast and efficient.
Try it out
In this hands-on guide, you’ll practice how to create and use a bind mount to share files between a host and a container.
Run a container
Download and install Docker Desktop.
Start a container using the httpd image with the following command:
$ docker run -d -p 8080:80 --name my_site httpd:2.4This will start the
httpdservice in the background, and publish the webpage to port8080on the host.Open the browser and access http://localhost:8080 or use the curl command to verify if it's working fine or not.
$ curl localhost:8080
Use a bind mount
Using a bind mount, you can map the configuration file on your host computer to a specific location within the container. In this example, you’ll see how to change the look and feel of the webpage by using bind mount:
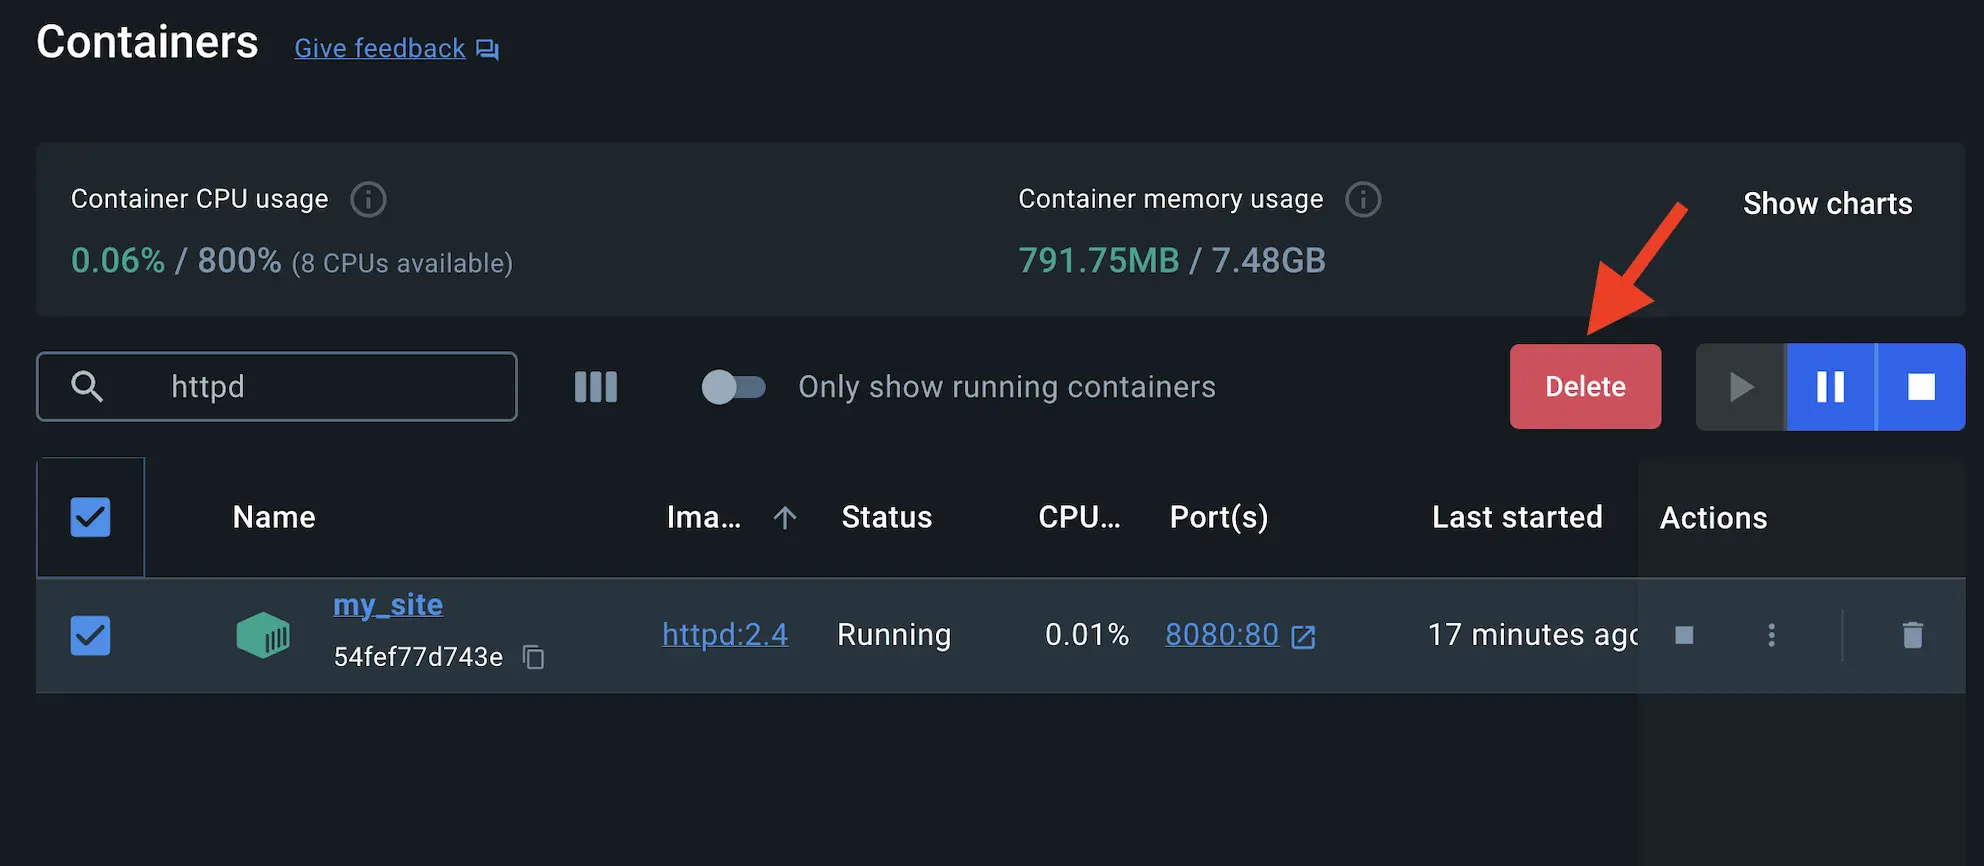
Delete the existing container by using the Docker Desktop Dashboard:
Create a new directory called
public_htmlon your host system.$ mkdir public_htmlNavigate into the newly created directory
public_htmland create a file calledindex.htmlwith the following content. This is a basic HTML document that creates a simple webpage that welcomes you with a friendly whale.<!DOCTYPE html> <html lang="en"> <head> <meta charset="UTF-8"> <title> My Website with a Whale & Docker!</title> </head> <body> <h1>Whalecome!!</h1> <p>Look! There's a friendly whale greeting you!</p> <pre id="docker-art"> ## . ## ## ## == ## ## ## ## ## === /"""""""""""""""""\___/ === { / ===- \______ O __/ \ \ __/ \____\_______/ Hello from Docker! </pre> </body> </html>It's time to run the container. The
--mountand-vexamples produce the same result. You can't run them both unless you remove themy_sitecontainer after running the first one.$ docker run -d --name my_site -p 8080:80 -v .:/usr/local/apache2/htdocs/ httpd:2.4$ docker run -d --name my_site -p 8080:80 --mount type=bind,source=./,target=/usr/local/apache2/htdocs/ httpd:2.4TipWhen using the
-vor--mountflag in Windows PowerShell, you need to provide the absolute path to your directory instead of just./. This is because PowerShell handles relative paths differently from bash (commonly used in Mac and Linux environments).With everything now up and running, you should be able to access the site via http://localhost:8080 and find a new webpage that welcomes you with a friendly whale.
Access the file on the Docker Desktop Dashboard
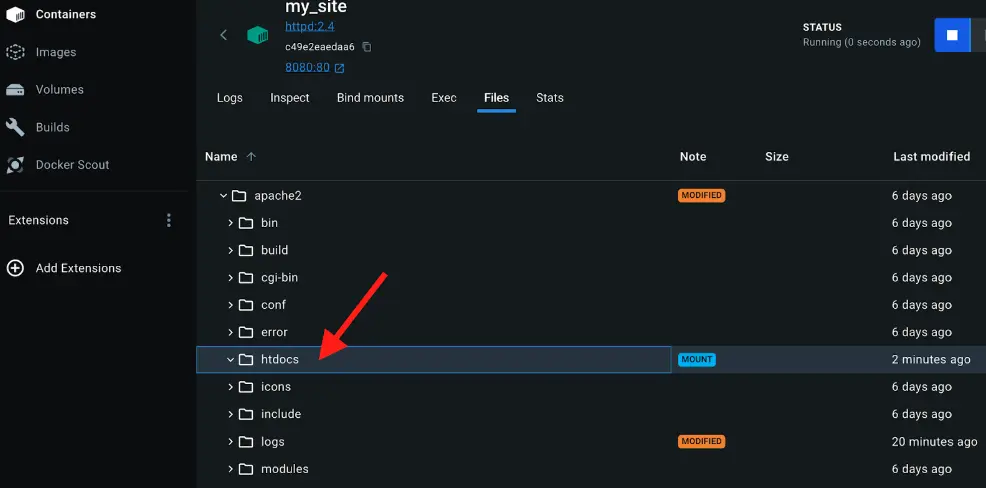
You can view the mounted files inside a container by selecting the container's Files tab and then selecting a file inside the
/usr/local/apache2/htdocs/directory. Then, select Open file editor.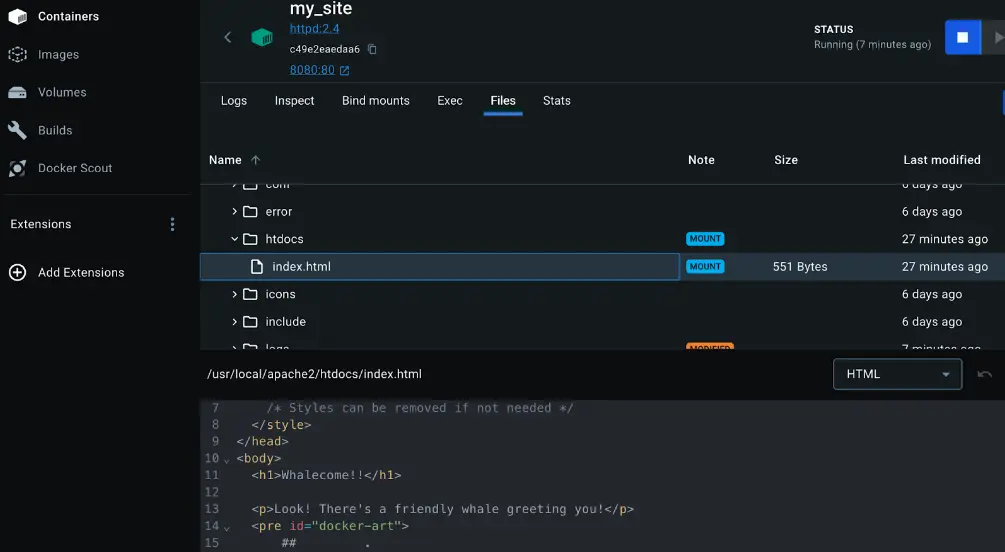
Delete the file on the host and verify the file is also deleted in the container. You will find that the files no longer exist under Files in the Docker Desktop Dashboard.
Recreate the HTML file on the host system and see that file re-appears under the Files tab under Containers on the Docker Desktop Dashboard. By now, you will be able to access the site too.
Stop your container
The container continues to run until you stop it.
Go to the Containers view in the Docker Desktop Dashboard.
Locate the container you'd like to stop.
Select the Stop action in the Actions column.
Additional resources
The following resources will help you learn more about bind mounts:
- Manage data in Docker
- Volumes
- Bind mounts
- Running containers
- Troubleshoot storage errors
- Persisting container data
Next steps
Now that you have learned about sharing local files with containers, it’s time to learn about multi-container applications.
Multi-container applications