What is a container?
Explanation
Imagine you're developing a killer web app that has three main components - a React frontend, a Python API, and a PostgreSQL database. If you wanted to work on this project, you'd have to install Node, Python, and PostgreSQL.
How do you make sure you have the same versions as the other developers on your team? Or your CI/CD system? Or what's used in production?
How do you ensure the version of Python (or Node or the database) your app needs isn't affected by what's already on your machine? How do you manage potential conflicts?
Enter containers!
What is a container? Simply put, containers are isolated processes for each of your app's components. Each component - the frontend React app, the Python API engine, and the database - runs in its own isolated environment, completely isolated from everything else on your machine.
Here's what makes them awesome. Containers are:
- Self-contained. Each container has everything it needs to function with no reliance on any pre-installed dependencies on the host machine.
- Isolated. Since containers run in isolation, they have minimal influence on the host and other containers, increasing the security of your applications.
- Independent. Each container is independently managed. Deleting one container won't affect any others.
- Portable. Containers can run anywhere! The container that runs on your development machine will work the same way in a data center or anywhere in the cloud!
Containers versus virtual machines (VMs)
Without getting too deep, a VM is an entire operating system with its own kernel, hardware drivers, programs, and applications. Spinning up a VM only to isolate a single application is a lot of overhead.
A container is simply an isolated process with all of the files it needs to run. If you run multiple containers, they all share the same kernel, allowing you to run more applications on less infrastructure.
Using VMs and containers together
Quite often, you will see containers and VMs used together. As an example, in a cloud environment, the provisioned machines are typically VMs. However, instead of provisioning one machine to run one application, a VM with a container runtime can run multiple containerized applications, increasing resource utilization and reducing costs.
Try it out
In this hands-on, you will see how to run a Docker container using the Docker Desktop GUI.
Use the following instructions to run a container.
Open Docker Desktop and select the Search field on the top navigation bar.
Specify
welcome-to-dockerin the search input and then select the Pull button.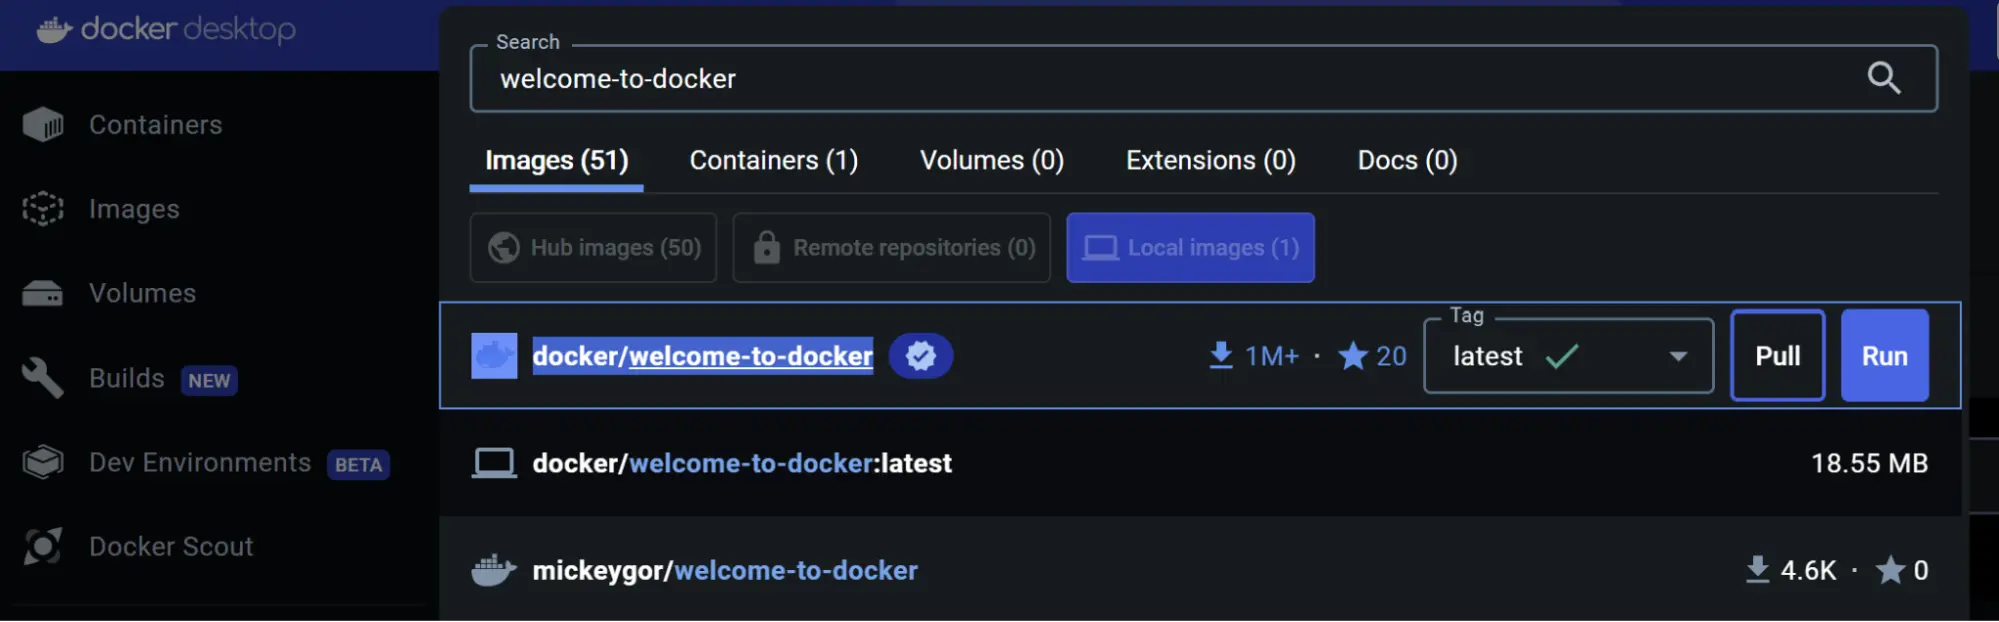
Once the image is successfully pulled, select the Run button.
Expand the Optional settings.
In the Container name, specify
welcome-to-docker.In the Host port, specify
8080.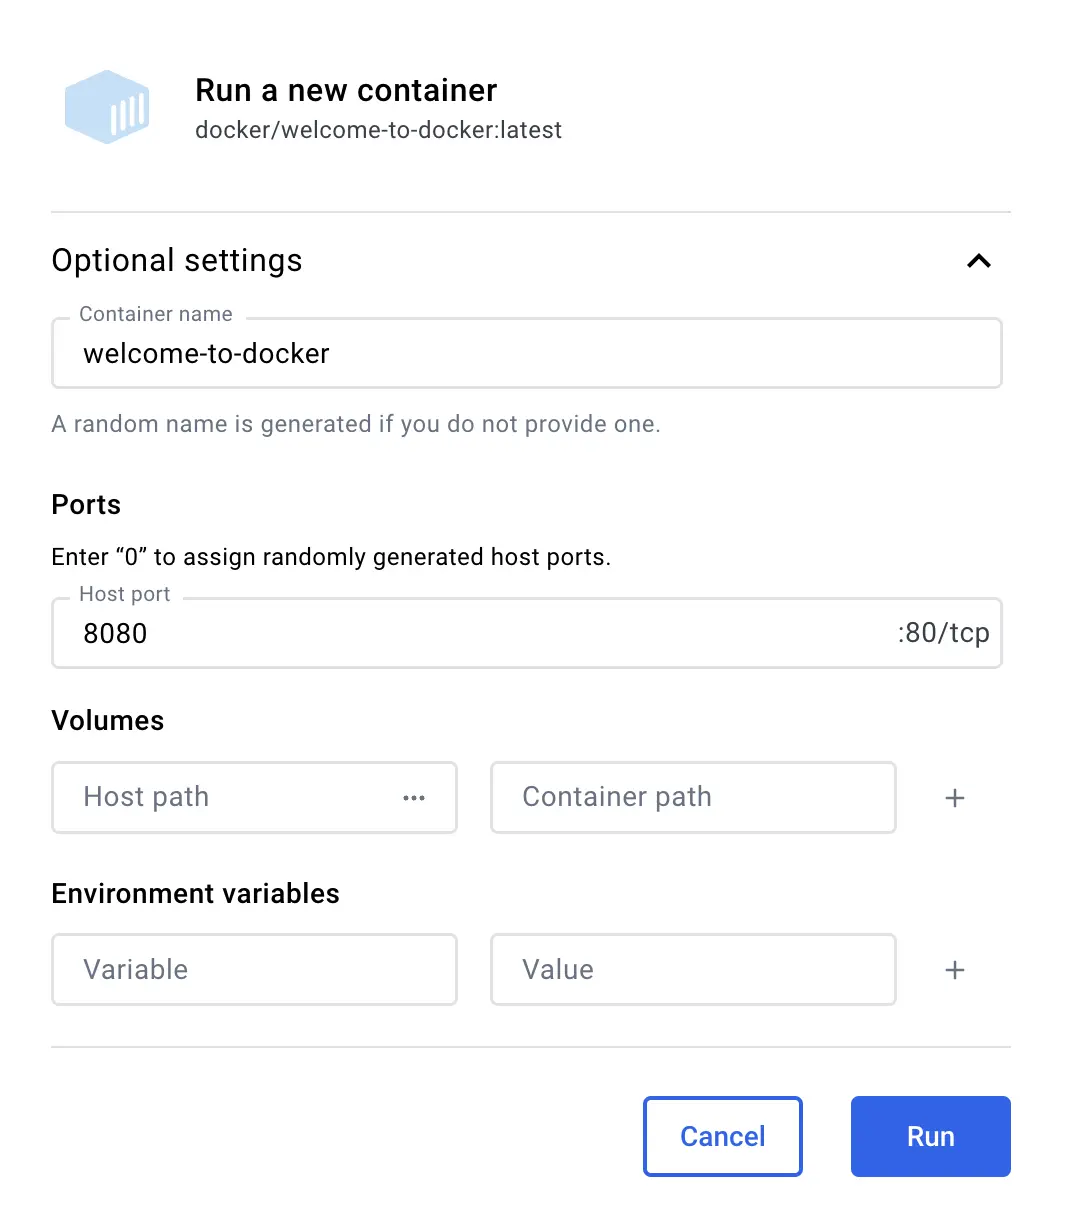
Select Run to start your container.
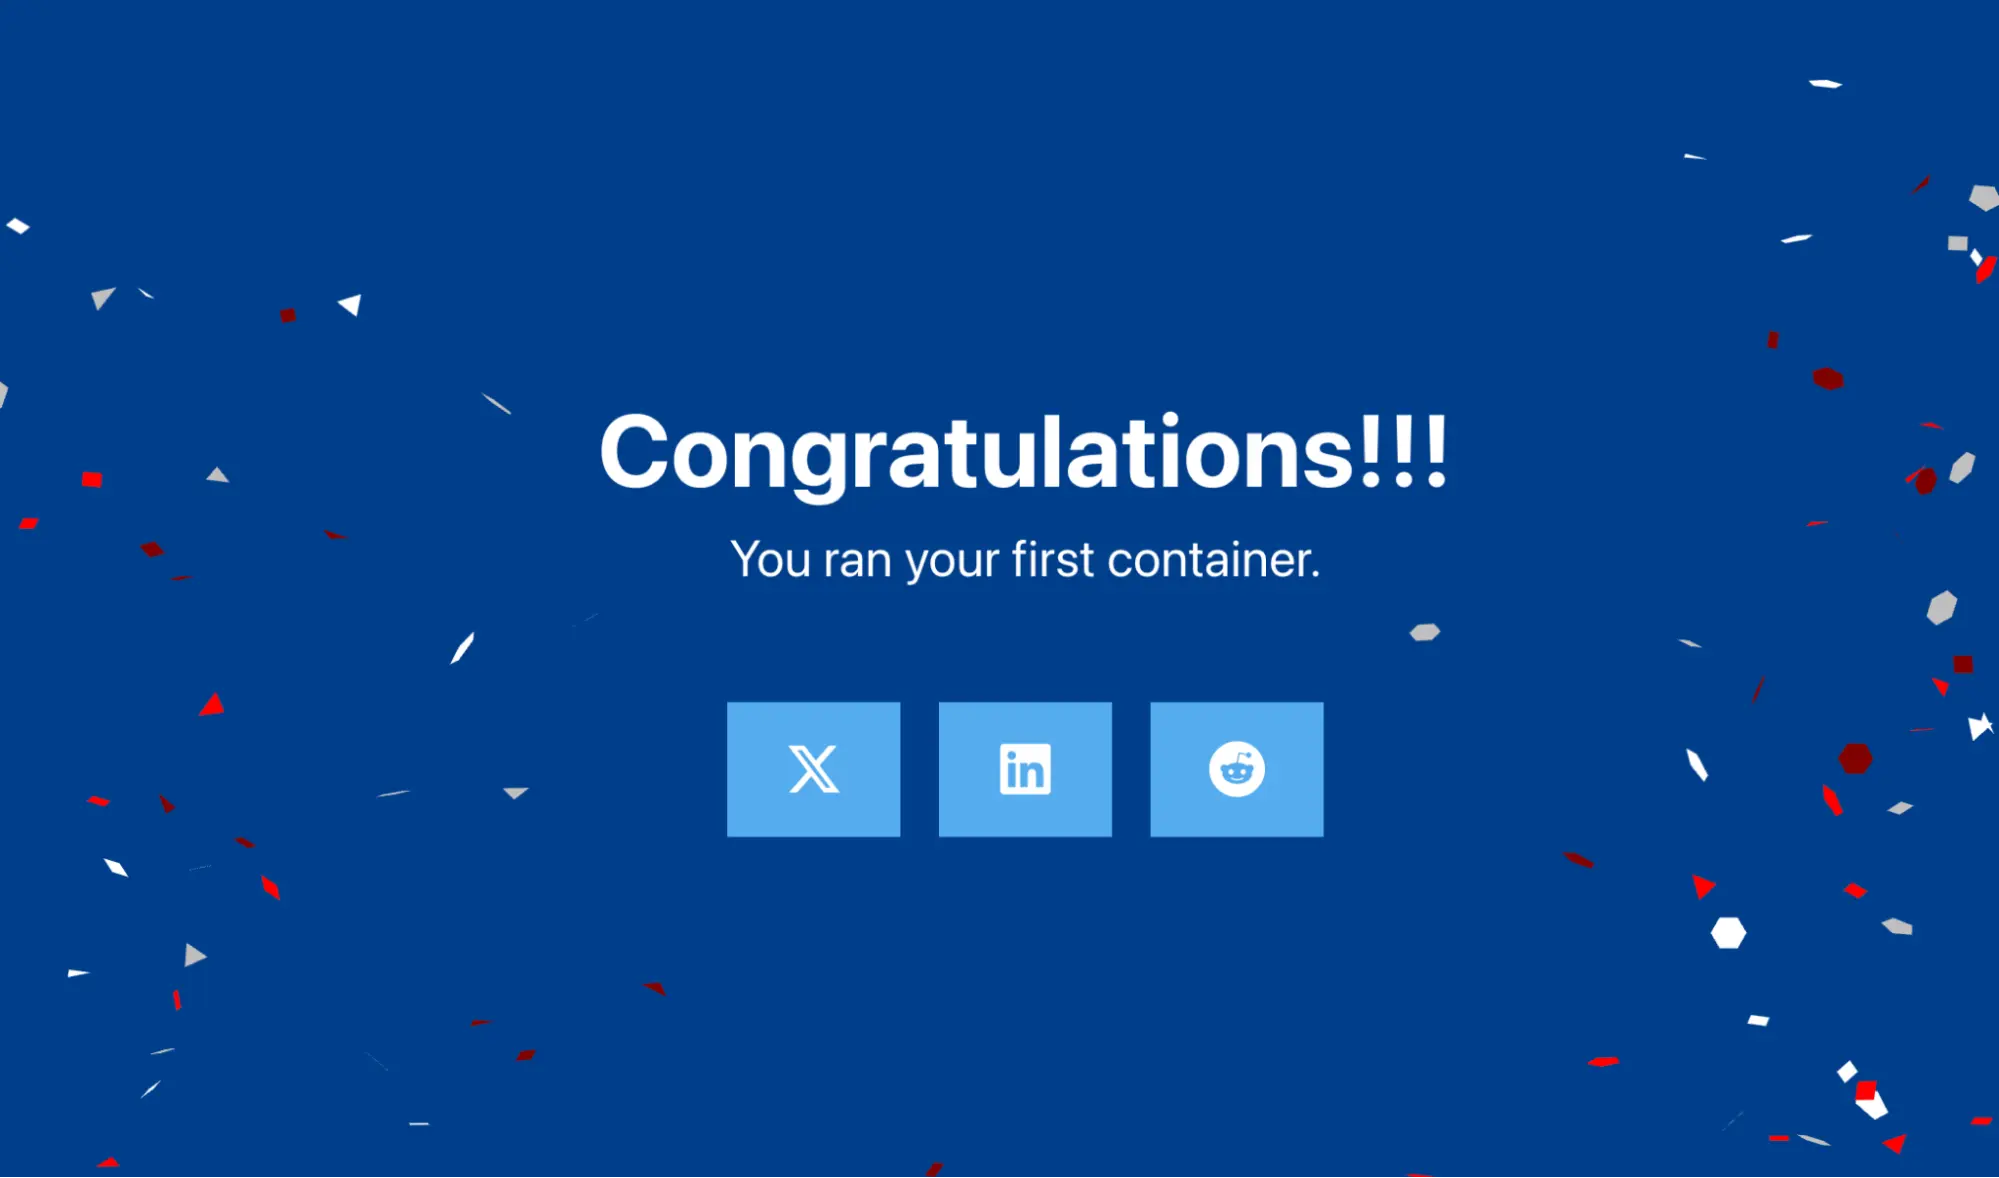
Congratulations! You just ran your first container! 🎉
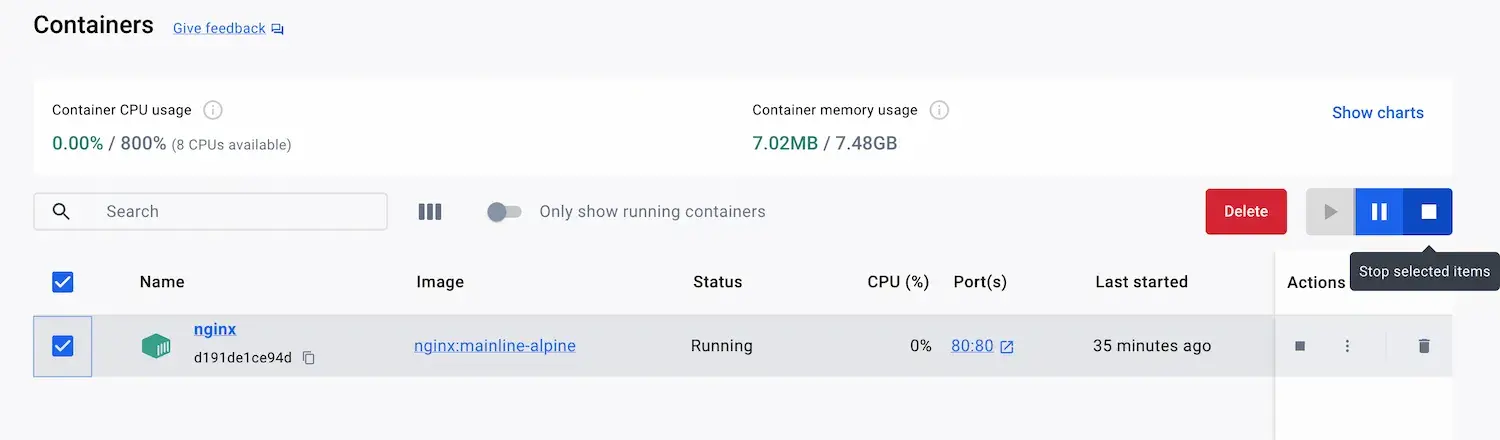
View your container
You can view all of your containers by going to the Containers view of the Docker Desktop Dashboard.
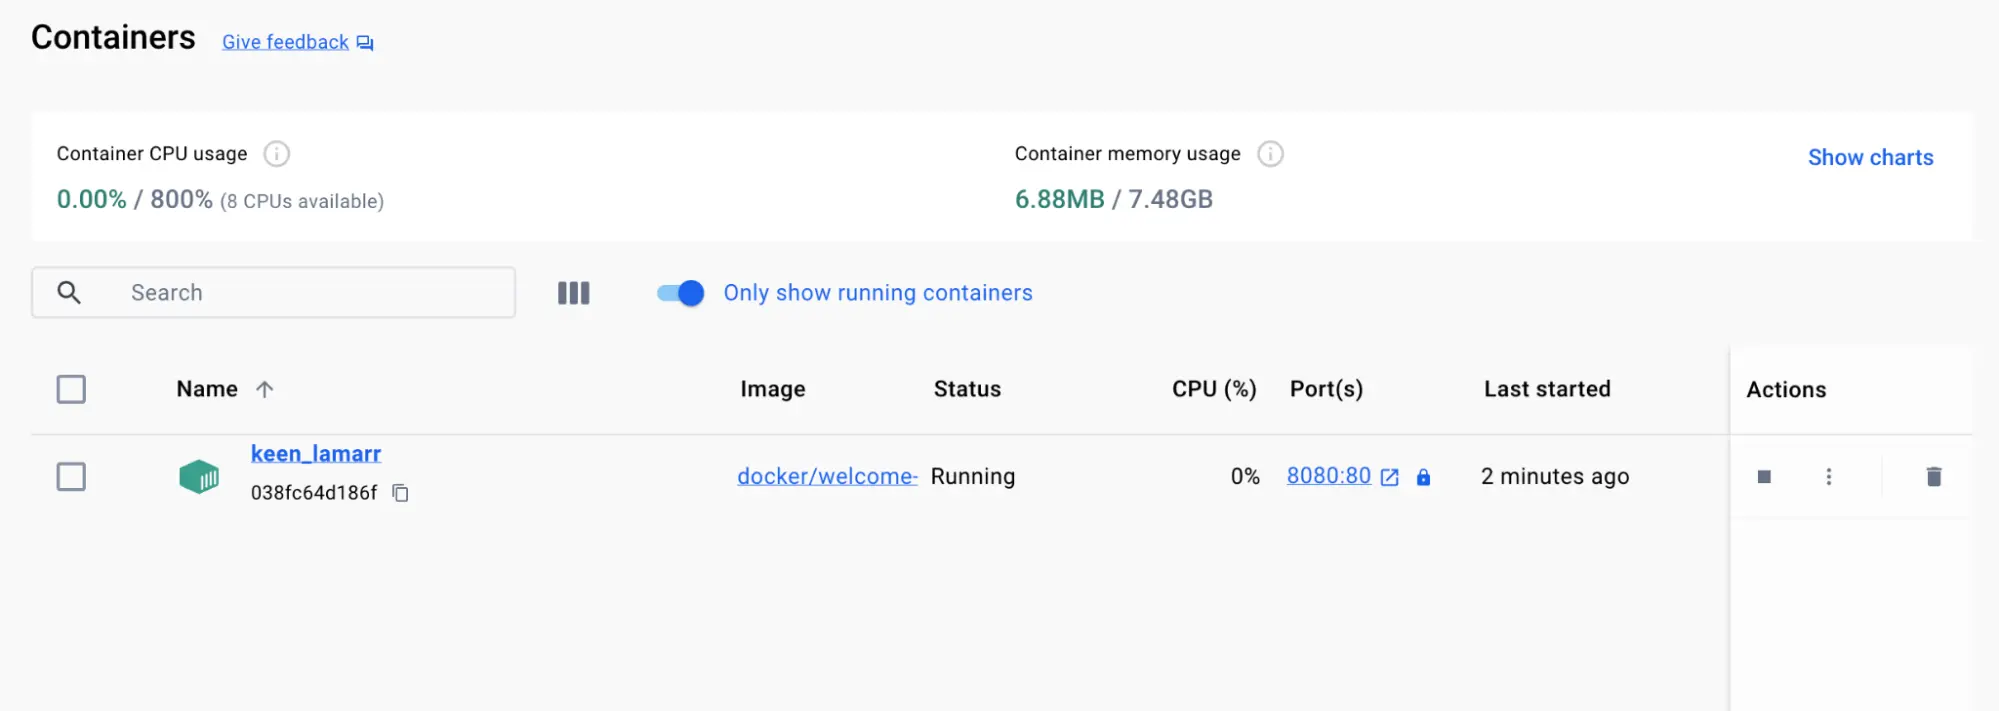
This container runs a web server that displays a simple website. When working with more complex projects, you'll run different parts in different containers. For example, you might run a different container for the frontend, backend, and database.
Access the frontend
When you launched the container, you exposed one of the container's ports onto your machine. Think of this as creating configuration to let you connect through the isolated environment of the container.
For this container, the frontend is accessible on port 8080. To open the website, select the link in the Port(s) column of your container or visit http://localhost:8080 in your browser.
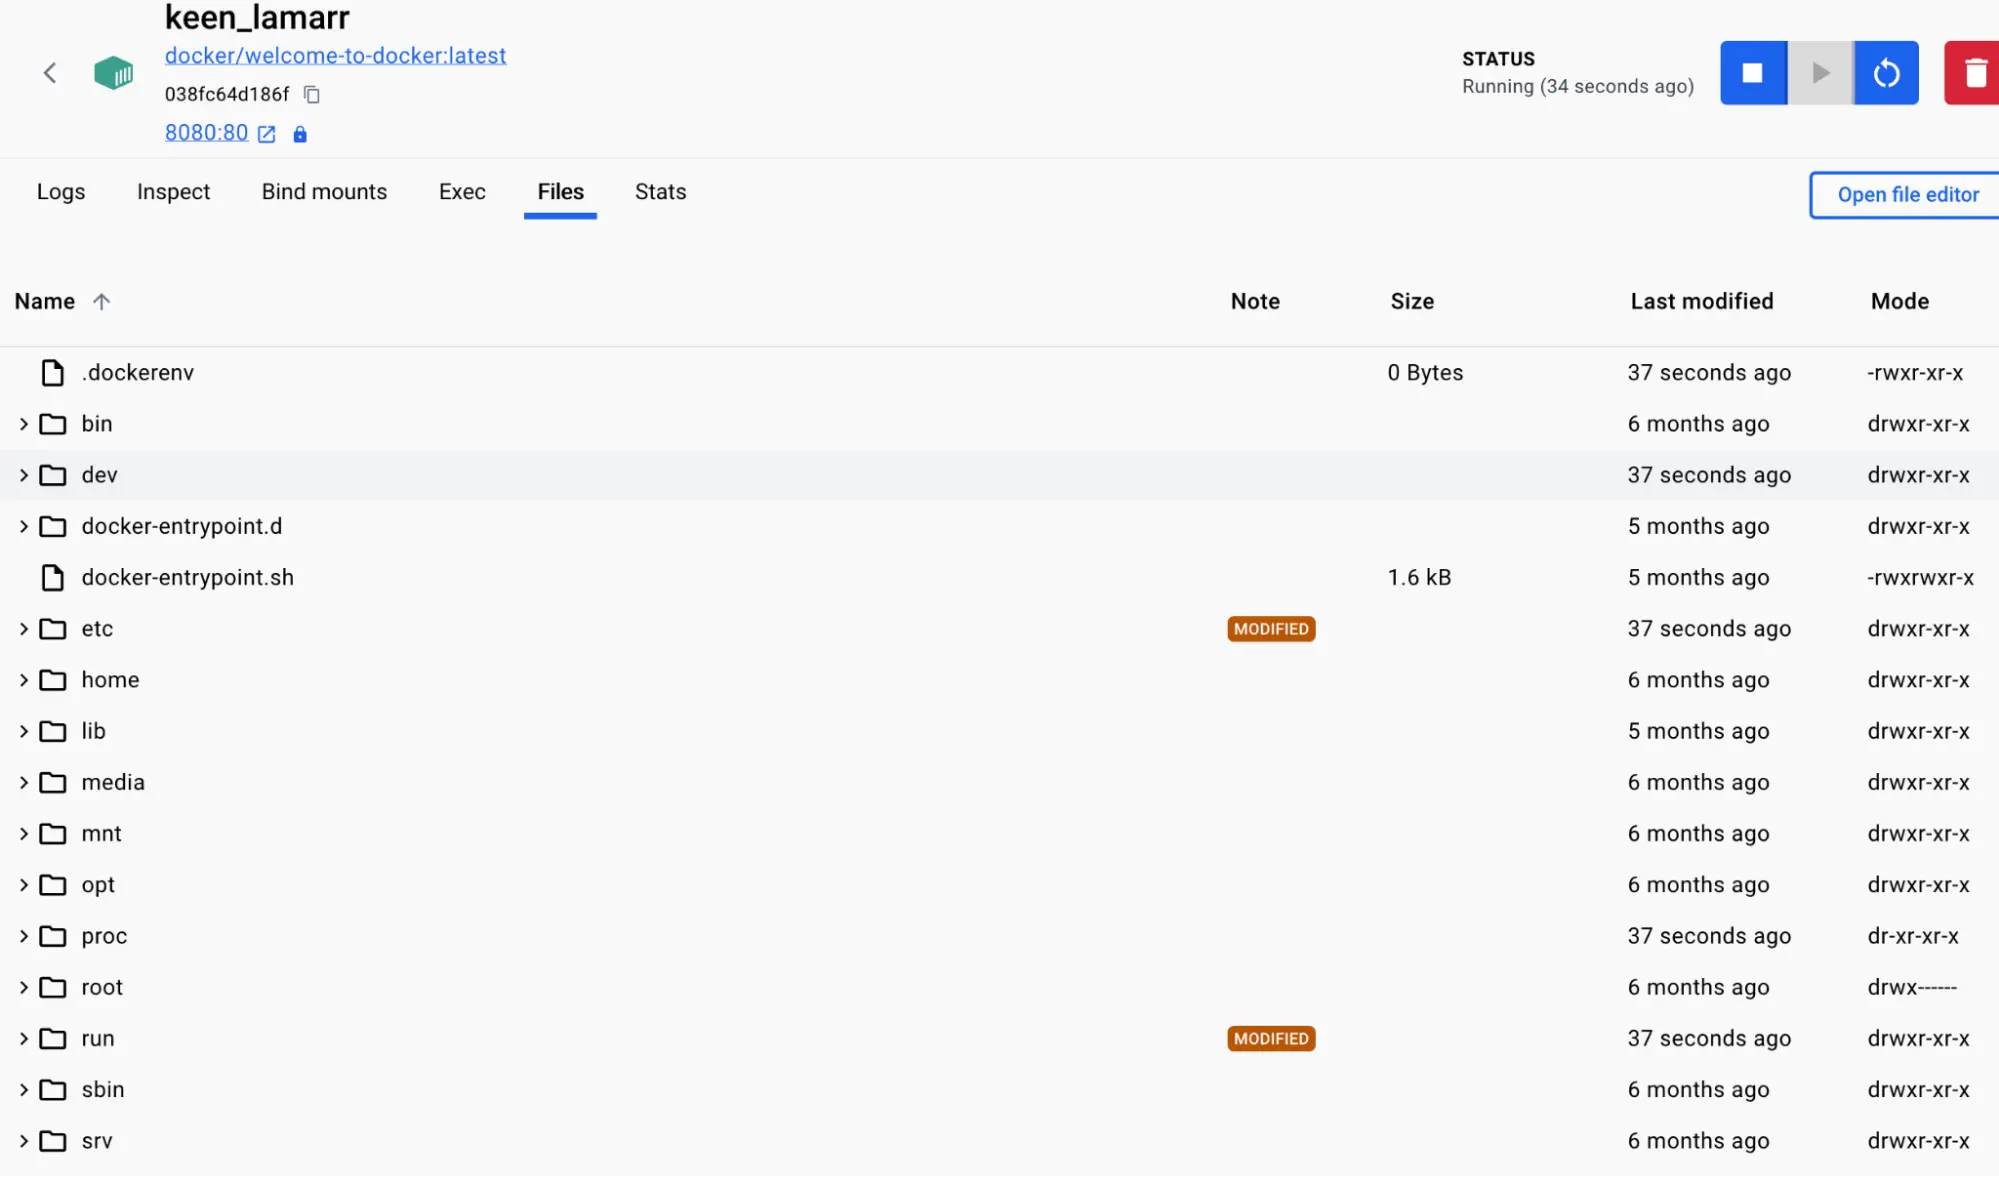
Explore your container
Docker Desktop lets you explore and interact with different aspects of your container. Try it out yourself.
Go to the Containers view in the Docker Desktop Dashboard.
Select your container.
Select the Files tab to explore your container's isolated file system.
Stop your container
The docker/welcome-to-docker container continues to run until you stop it.
Go to the Containers view in the Docker Desktop Dashboard.
Locate the container you'd like to stop.
Select the Stop action in the Actions column.
Follow the instructions to run a container using the CLI:
Open your CLI terminal and start a container by using the
docker runcommand:$ docker run -d -p 8080:80 docker/welcome-to-dockerThe output from this command is the full container ID.
Congratulations! You just fired up your first container! 🎉
View your running containers
You can verify if the container is up and running by using the
docker ps command:
docker ps
You will see output like the following:
 CONTAINER ID   IMAGE                      COMMAND                  CREATED          STATUS          PORTS                      NAMES
 a1f7a4bb3a27   docker/welcome-to-docker   "/docker-entrypoint.…"   11 seconds ago   Up 11 seconds   0.0.0.0:8080->80/tcp       gracious_keldysh
This container runs a web server that displays a simple website. When working with more complex projects, you'll run different parts in different containers. For example, a different container for the frontend, backend, and database.
TipThe
docker pscommand will show you only running containers. To view stopped containers, add the-aflag to list all containers:docker ps -a
Access the frontend
When you launched the container, you exposed one of the container's ports onto your machine. Think of this as creating configuration to let you to connect through the isolated environment of the container.
For this container, the frontend is accessible on port 8080. To open the website, select the link in the Port(s) column of your container or visit http://localhost:8080 in your browser.
Stop your container
The docker/welcome-to-docker container continues to run until you stop it. You can stop a container using the docker stop command.
Run
docker psto get the ID of the containerProvide the container ID or name to the
docker stopcommand:docker stop <the-container-id>
TipWhen referencing containers by ID, you don't need to provide the full ID. You only need to provide enough of the ID to make it unique. As an example, the previous container could be stopped by running the following command:
docker stop a1f
Additional resources
The following links provide additional guidance into containers:
Next steps
Now that you have learned the basics of a Docker container, it's time to learn about Docker images.
What is an image?