What is Docker Compose?
Explanation
If you've been following the guides so far, you've been working with single container applications. But, now you're wanting to do something more complicated - run databases, message queues, caches, or a variety of other services. Do you install everything in a single container? Run multiple containers? If you run multiple, how do you connect them all together?
One best practice for containers is that each container should do one thing and do it well. While there are exceptions to this rule, avoid the tendency to have one container do multiple things.
You can use multiple docker run commands to start multiple containers. But, you'll soon realize you'll need to manage networks, all of the flags needed to connect containers to those networks, and more. And when you're done, cleanup is a little more complicated.
With Docker Compose, you can define all of your containers and their configurations in a single YAML file. If you include this file in your code repository, anyone that clones your repository can get up and running with a single command.
It's important to understand that Compose is a declarative tool - you simply define it and go. You don't always need to recreate everything from scratch. If you make a change, run docker compose up again and Compose will reconcile the changes in your file and apply them intelligently.
Dockerfile versus Compose file
A Dockerfile provides instructions to build a container image while a Compose file defines your running containers. Quite often, a Compose file references a Dockerfile to build an image to use for a particular service.
Try it out
In this hands-on, you will learn how to use a Docker Compose to run a multi-container application. You'll use a simple to-do list app built with Node.js and MySQL as a database server.
Start the application
Follow the instructions to run the to-do list app on your system.
Download and install Docker Desktop.
Open a terminal and clone this sample application.
git clone https://github.com/dockersamples/todo-list-appNavigate into the
todo-list-appdirectory:cd todo-list-appInside this directory, you'll find a file named
compose.yaml. This YAML file is where all the magic happens! It defines all the services that make up your application, along with their configurations. Each service specifies its image, ports, volumes, networks, and any other settings necessary for its functionality. Take some time to explore the YAML file and familiarize yourself with its structure.Use the
docker compose upcommand to start the application:docker compose up -d --buildWhen you run this command, you should see an output like this:
[+] Running 5/5
✔ app 3 layers [⣿⣿⣿]      0B/0B            Pulled          7.1s
  ✔ e6f4e57cc59e Download complete                          0.9s
  ✔ df998480d81d Download complete                          1.0s
  ✔ 31e174fedd23 Download complete                          2.5s
  ✔ 43c47a581c29 Download complete                          2.0s
[+] Running 4/4
  ⠸ Network todo-list-app_default           Created         0.3s
  ⠸ Volume "todo-list-app_todo-mysql-data"  Created         0.3s
  ✔ Container todo-list-app-app-1           Started         0.3s
  ✔ Container todo-list-app-mysql-1         Started         0.3s
A lot happened here! A couple of things to call out:
- Two container images were downloaded from Docker Hub - node and MySQL
- A network was created for your application
- A volume was created to persist the database files between container restarts
- Two containers were started with all of their necessary config
If this feels overwhelming, don't worry! You'll get there!
With everything now up and running, you can open http://localhost:3000 in your browser to see the site. Note that the application may take 10-15 seconds to fully start. If the page doesn't load right away, wait a moment and refresh. Feel free to add items to the list, check them off, and remove them.

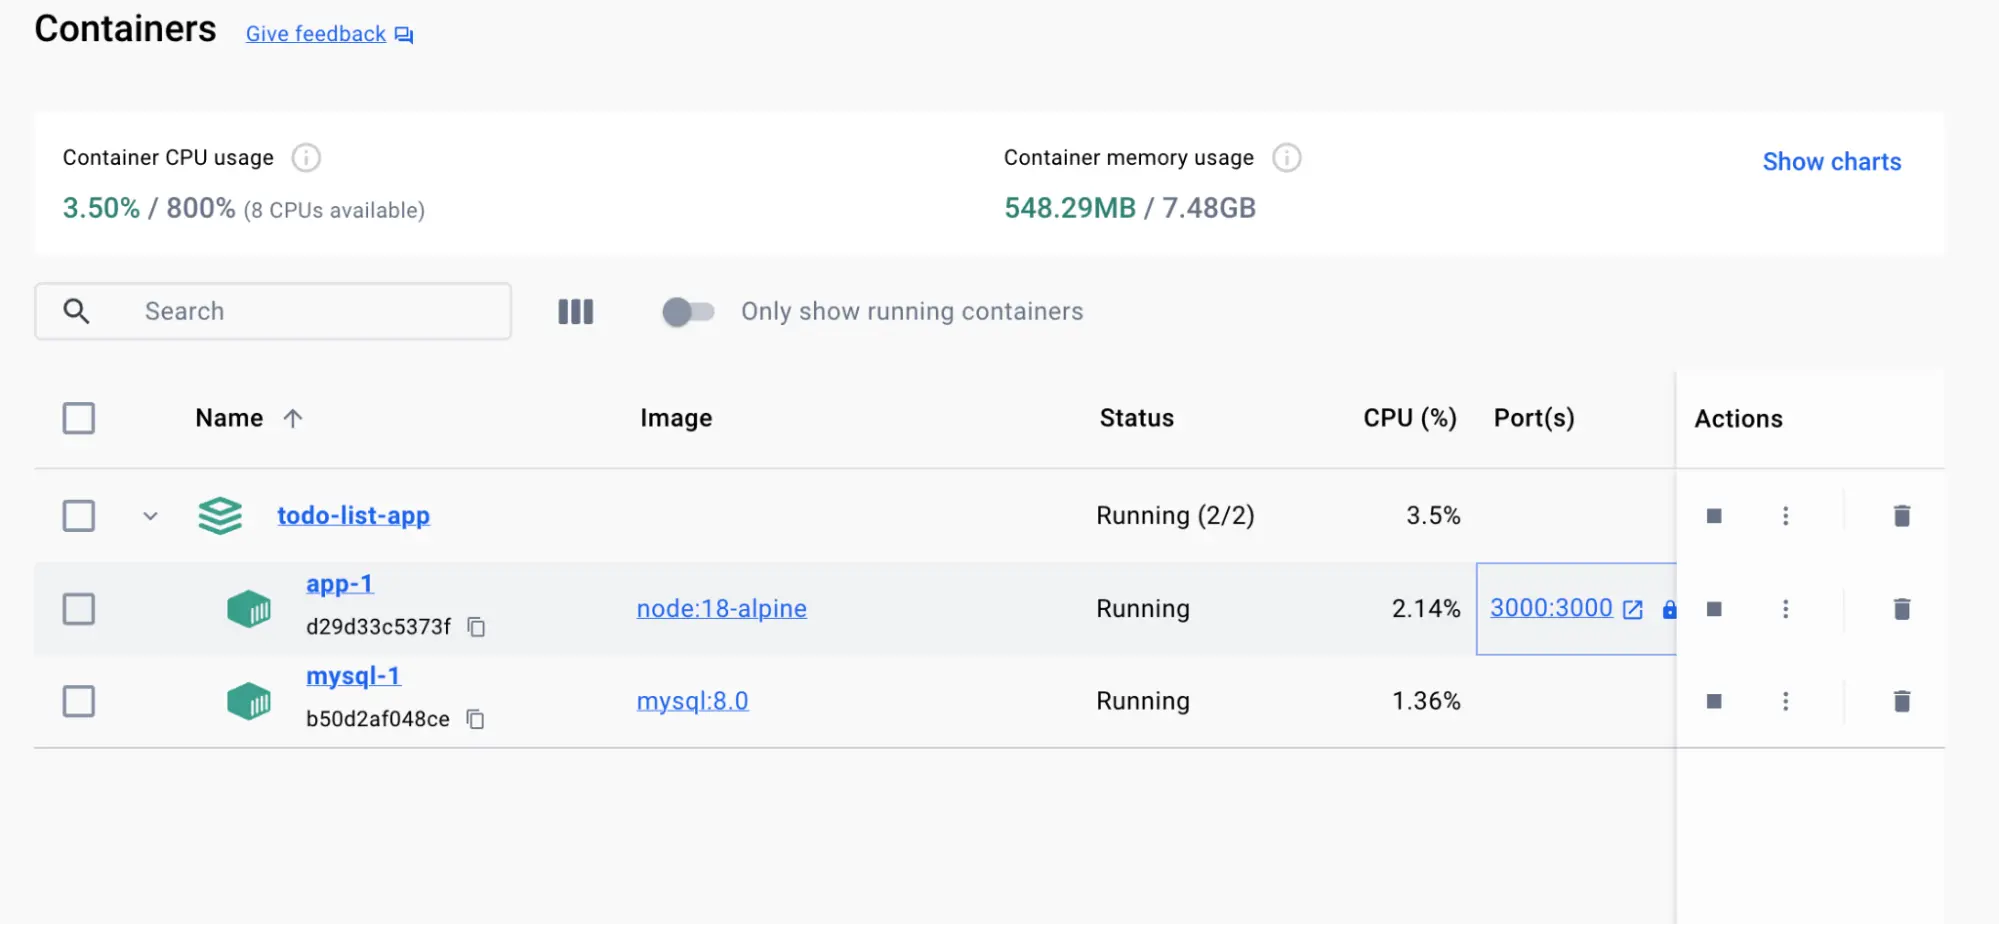
If you look at the Docker Desktop GUI, you can see the containers and dive deeper into their configuration.
Tear it down
Since this application was started using Docker Compose, it's easy to tear it all down when you're done.
In the CLI, use the
docker compose downcommand to remove everything:docker compose downYou'll see output similar to the following:
[+] Running 3/3
✔ Container todo-list-app-mysql-1  Removed        2.9s
✔ Container todo-list-app-app-1    Removed        0.1s
✔ Network todo-list-app_default    Removed        0.1s
Volume persistence
By default, volumes aren't automatically removed when you tear down a Compose stack. The idea is that you might want the data back if you start the stack again.
If you do want to remove the volumes, add the
--volumesflag when running thedocker compose downcommand:docker compose down --volumes [+] Running 1/0 ✔ Volume todo-list-app_todo-mysql-data RemovedAlternatively, you can use the Docker Desktop GUI to remove the containers by selecting the application stack and selecting the Delete button.
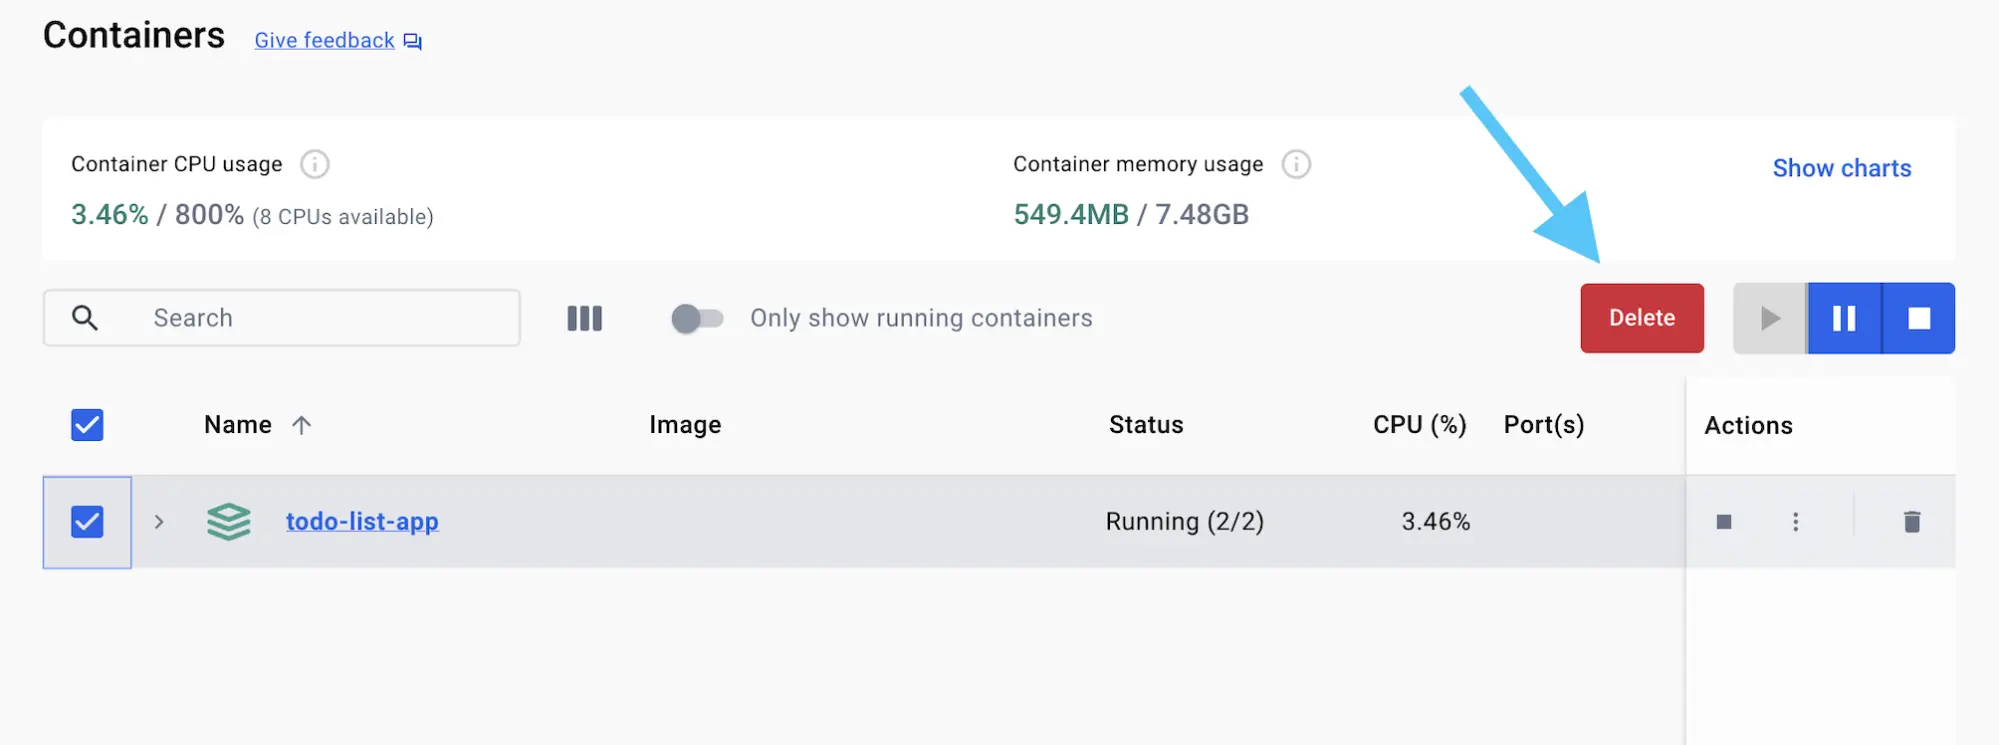
Using the GUI for Compose stacks
Note that if you remove the containers for a Compose app in the GUI, it's removing only the containers. You'll have to manually remove the network and volumes if you want to do so.
In this walkthrough, you learned how to use Docker Compose to start and stop a multi-container application.
Additional resources
This page was a brief introduction to Compose. In the following resources, you can dive deeper into Compose and how to write Compose files.